Creating a popup on BuzzHub is a straightforward process that can significantly boost your website’s engagement and conversion rates. Here’s a simple guide to help you get started:
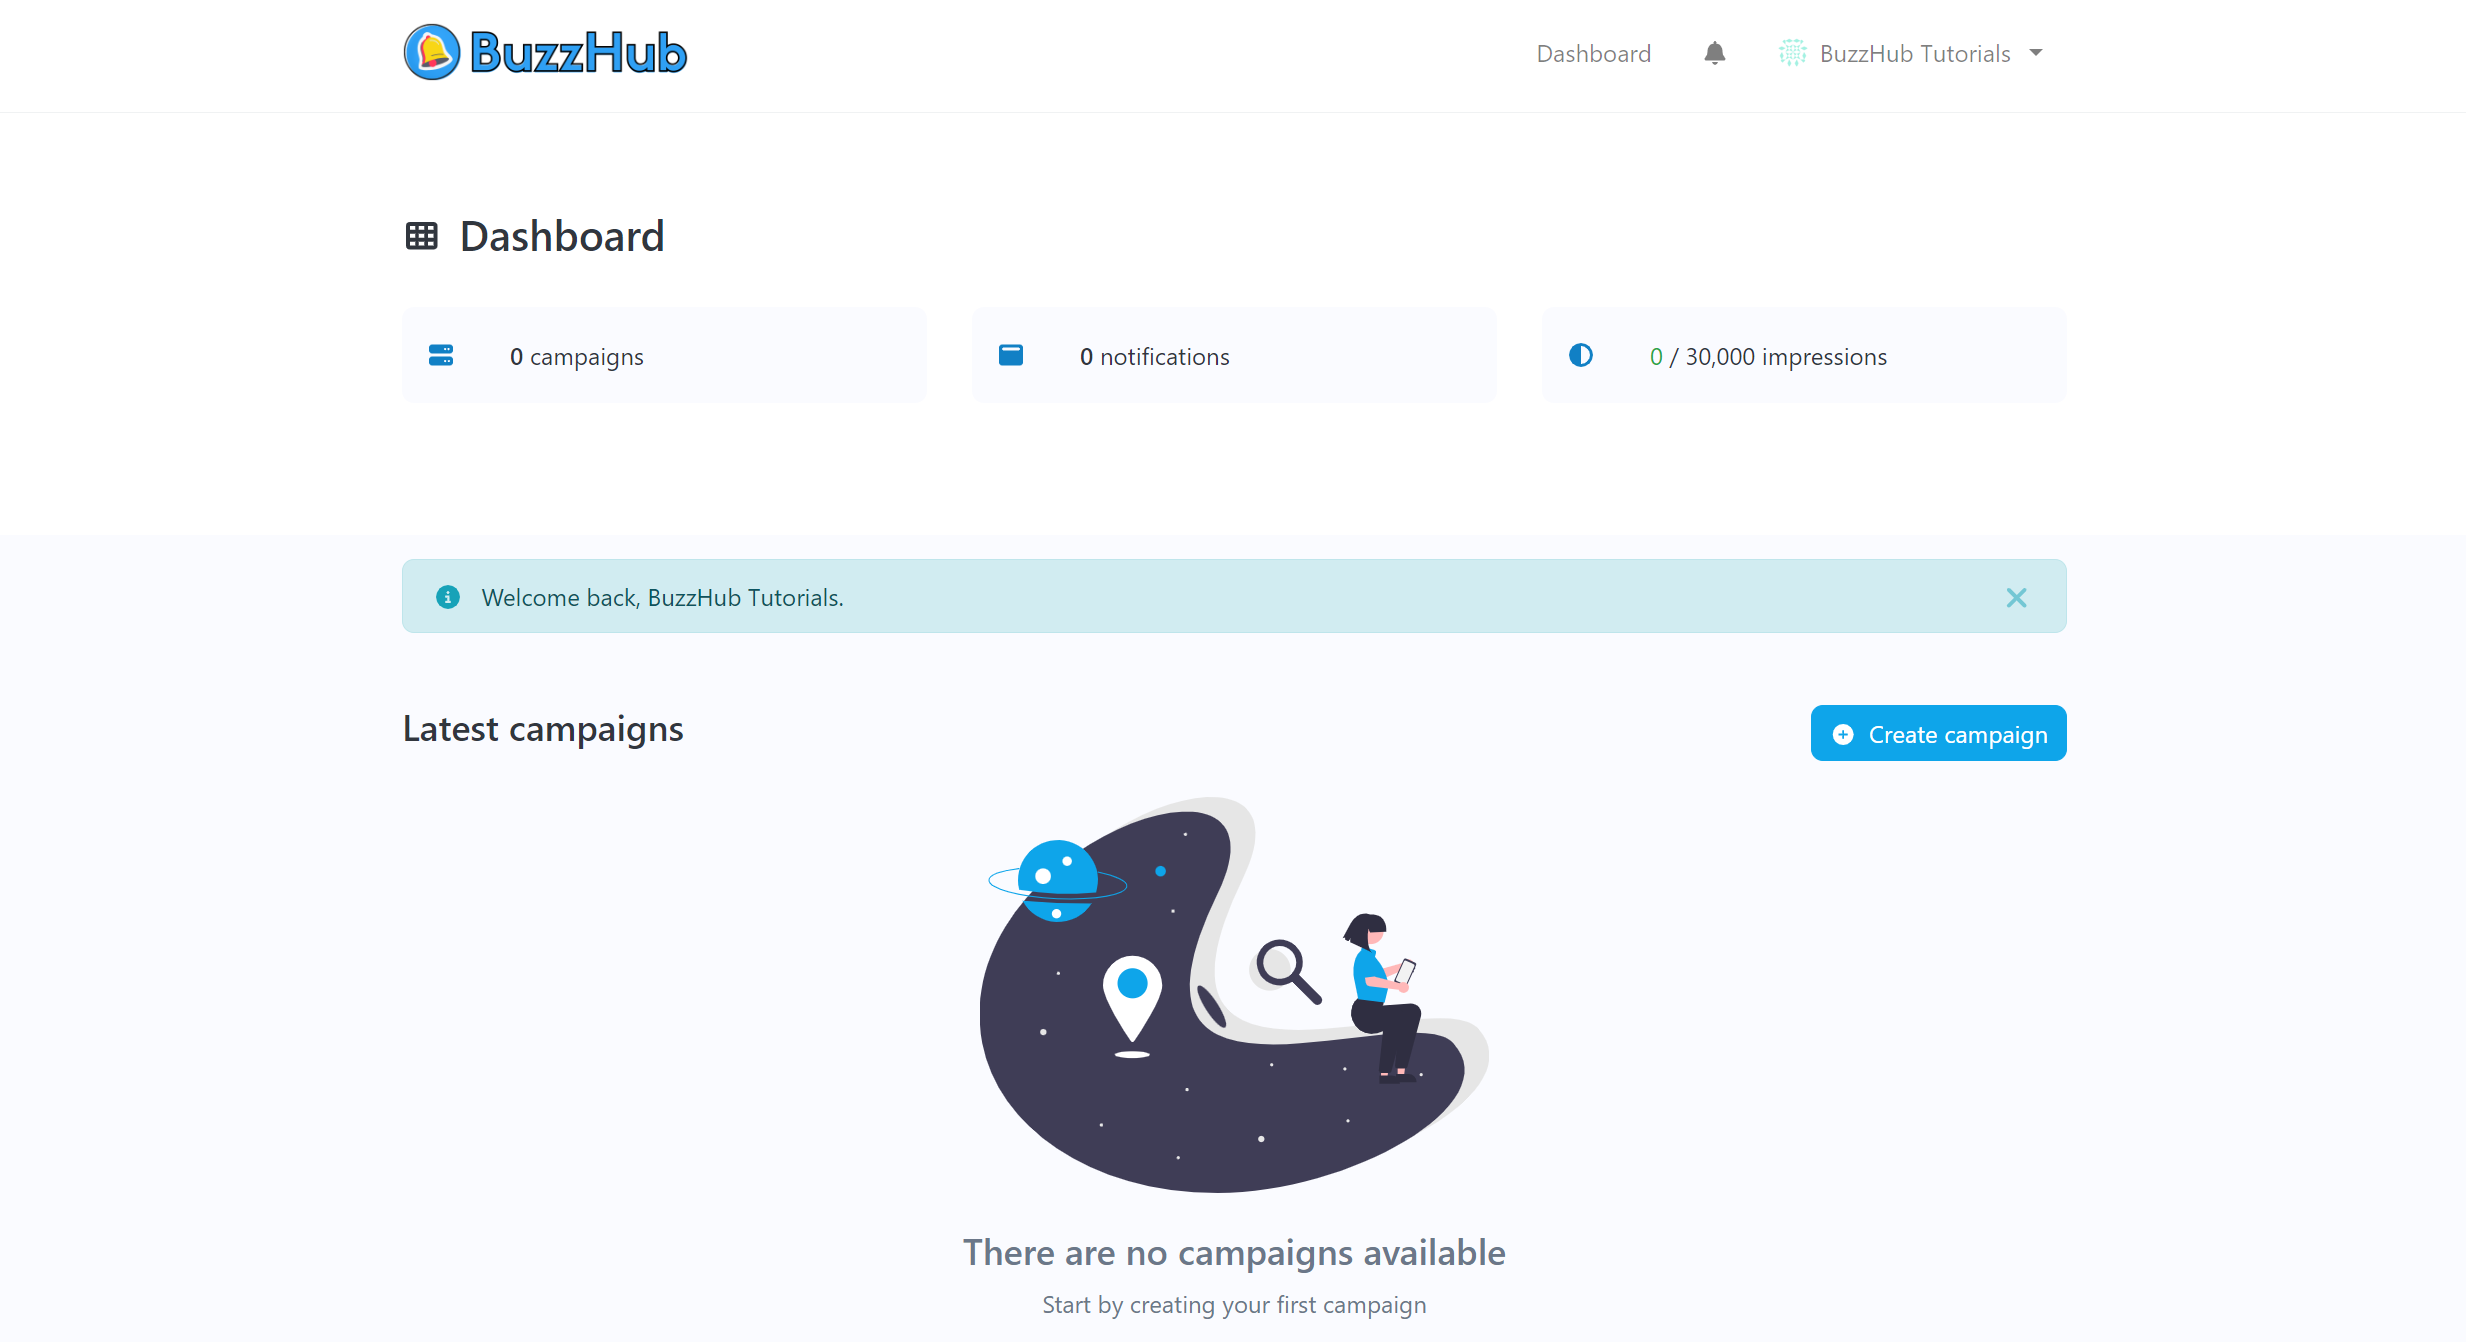
Step 1: Access the Dashboard
- Sign Up and Login: First, sign up for BuzzHub and log into your account.
- Open the Dashboard: You will land on the user-friendly BuzzHub dashboard.
Step 2: Create a New Campaign
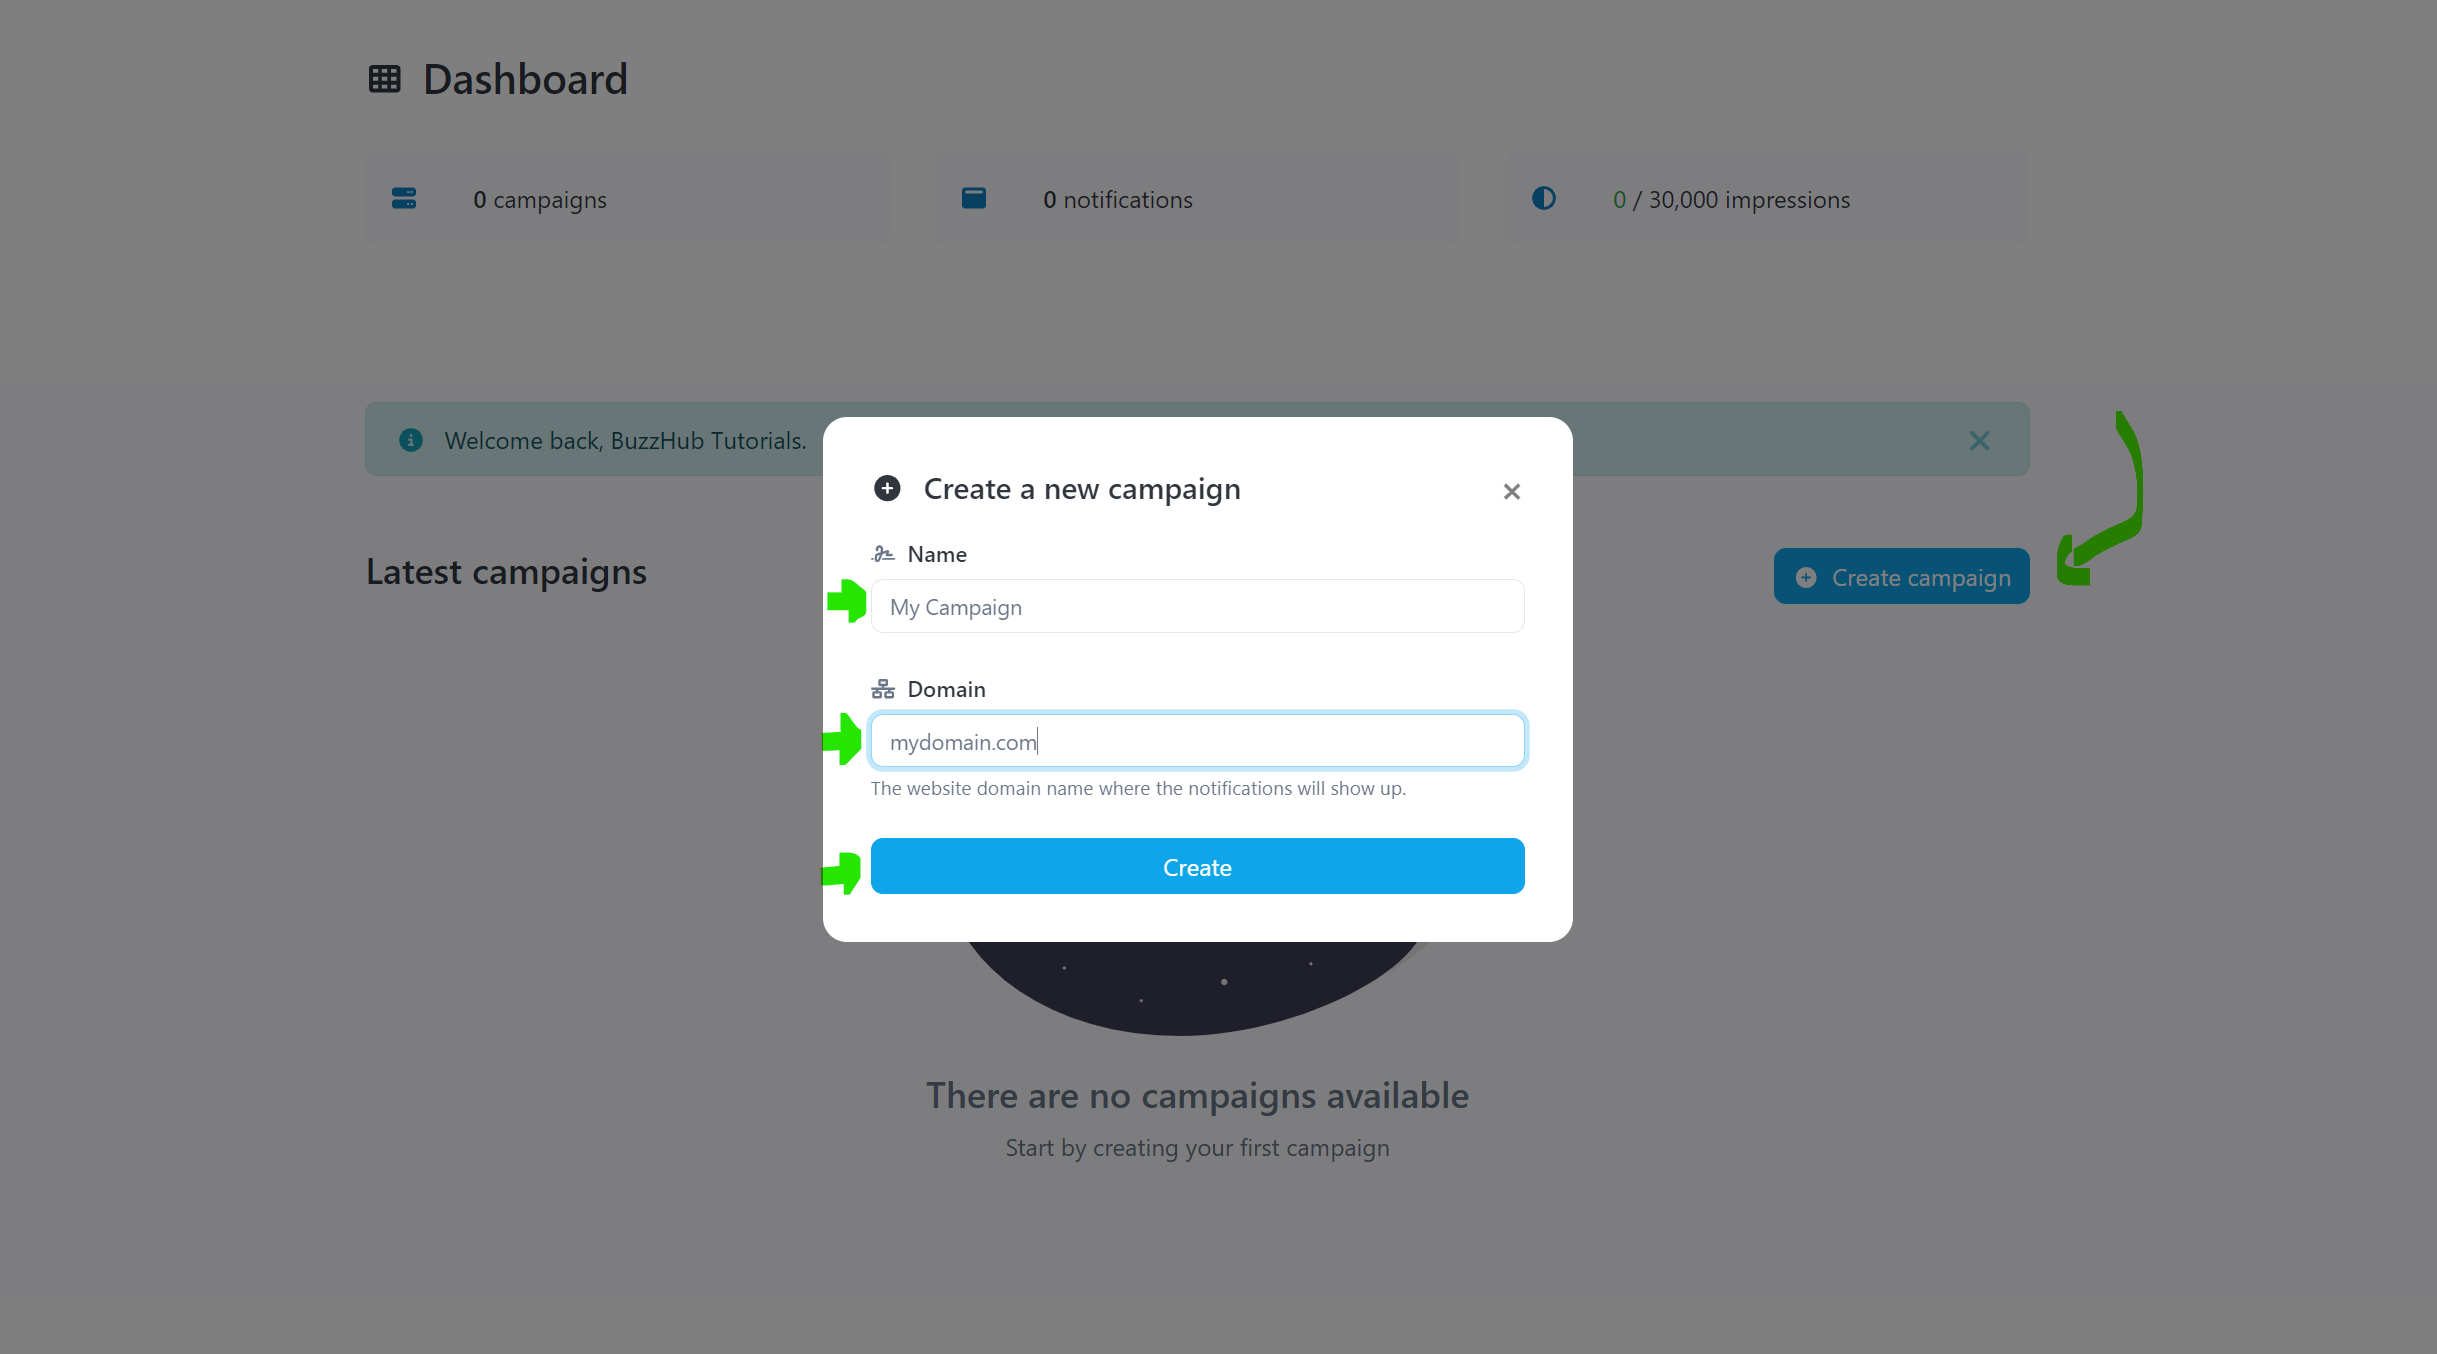
- Click on “Create Campaign”: Find and click the "Create Campaign" button.
- Name Your Campaign: Give your campaign a meaningful name.
- Enter Your Domain: Type in your website’s domain name. (e.g mydomain.com)
- Click “Create”: Press the “Create” button to set up your campaign.
Step 3: Add the BuzzHub Pixel to Your Website
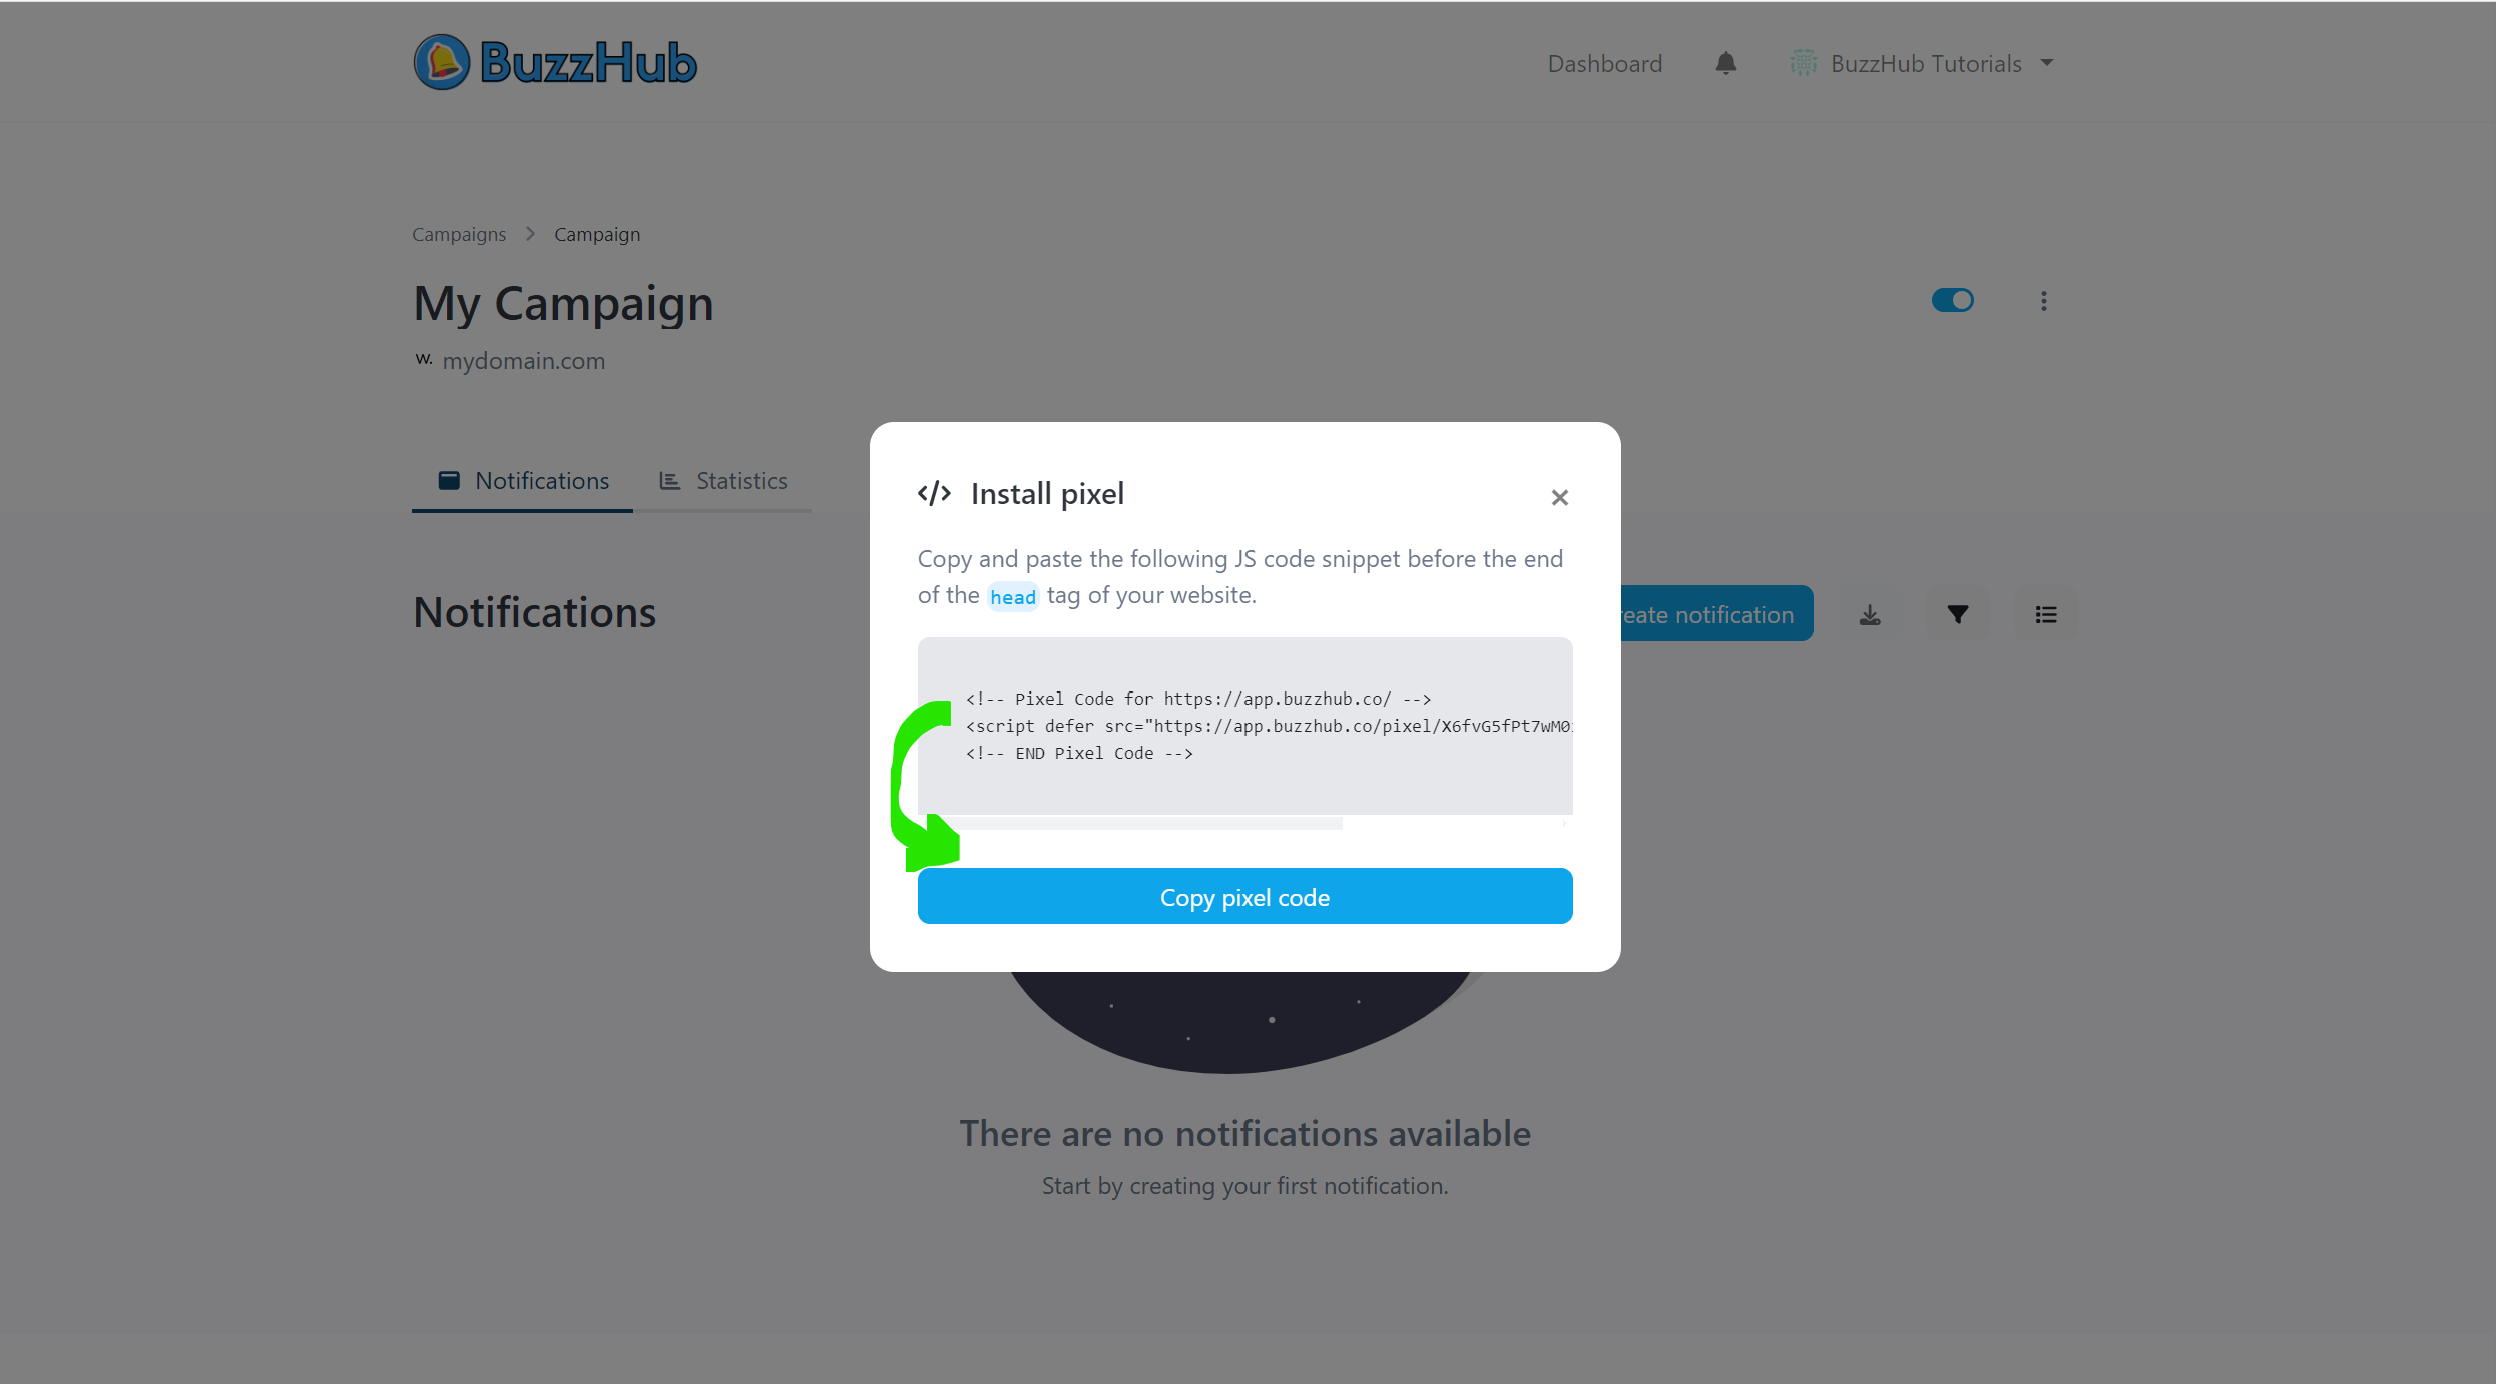
- Copy the Code: A popup will appear with a small snippet of code (the BuzzHub Pixel). Copy this code.
- Add to Website: Paste the code into your website’s HTML. This usually takes less than a minute and can be done on any platform, such as Shopify, WordPress, or Wix.
Step 4: Set Up Your First Popup
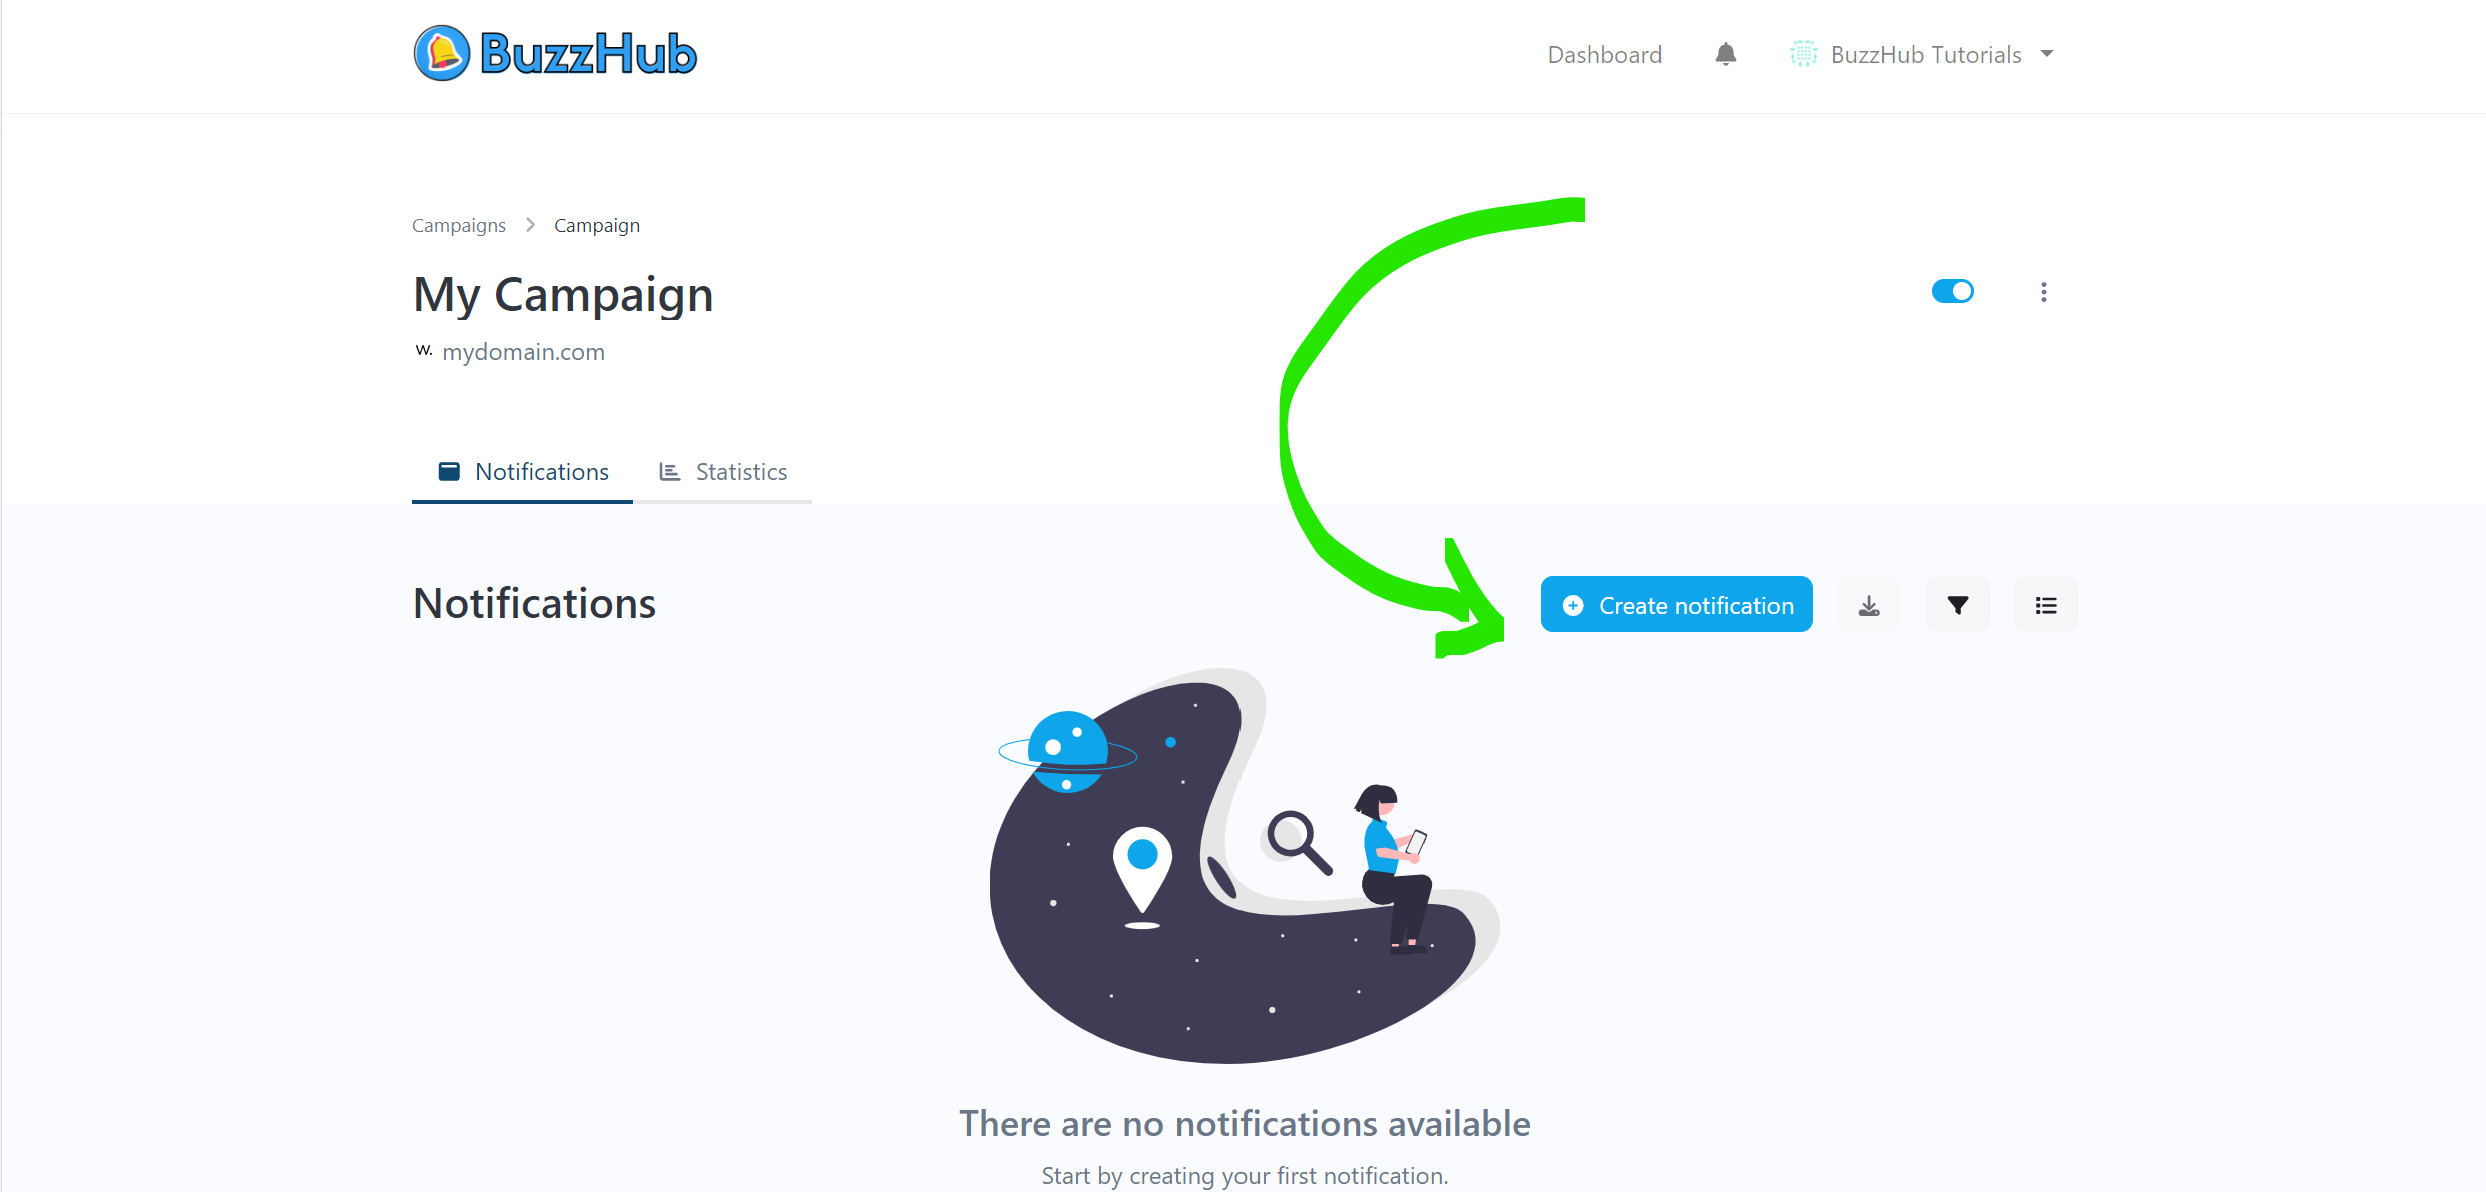
- Create a Notification: Whilst inside your new campaign, click on “Create Notification.”
- Choose a Popup Type: Select from a variety of customizable popups such as recent purchases, reviews, live counter, etc.
Step 5: Customize Your Popup
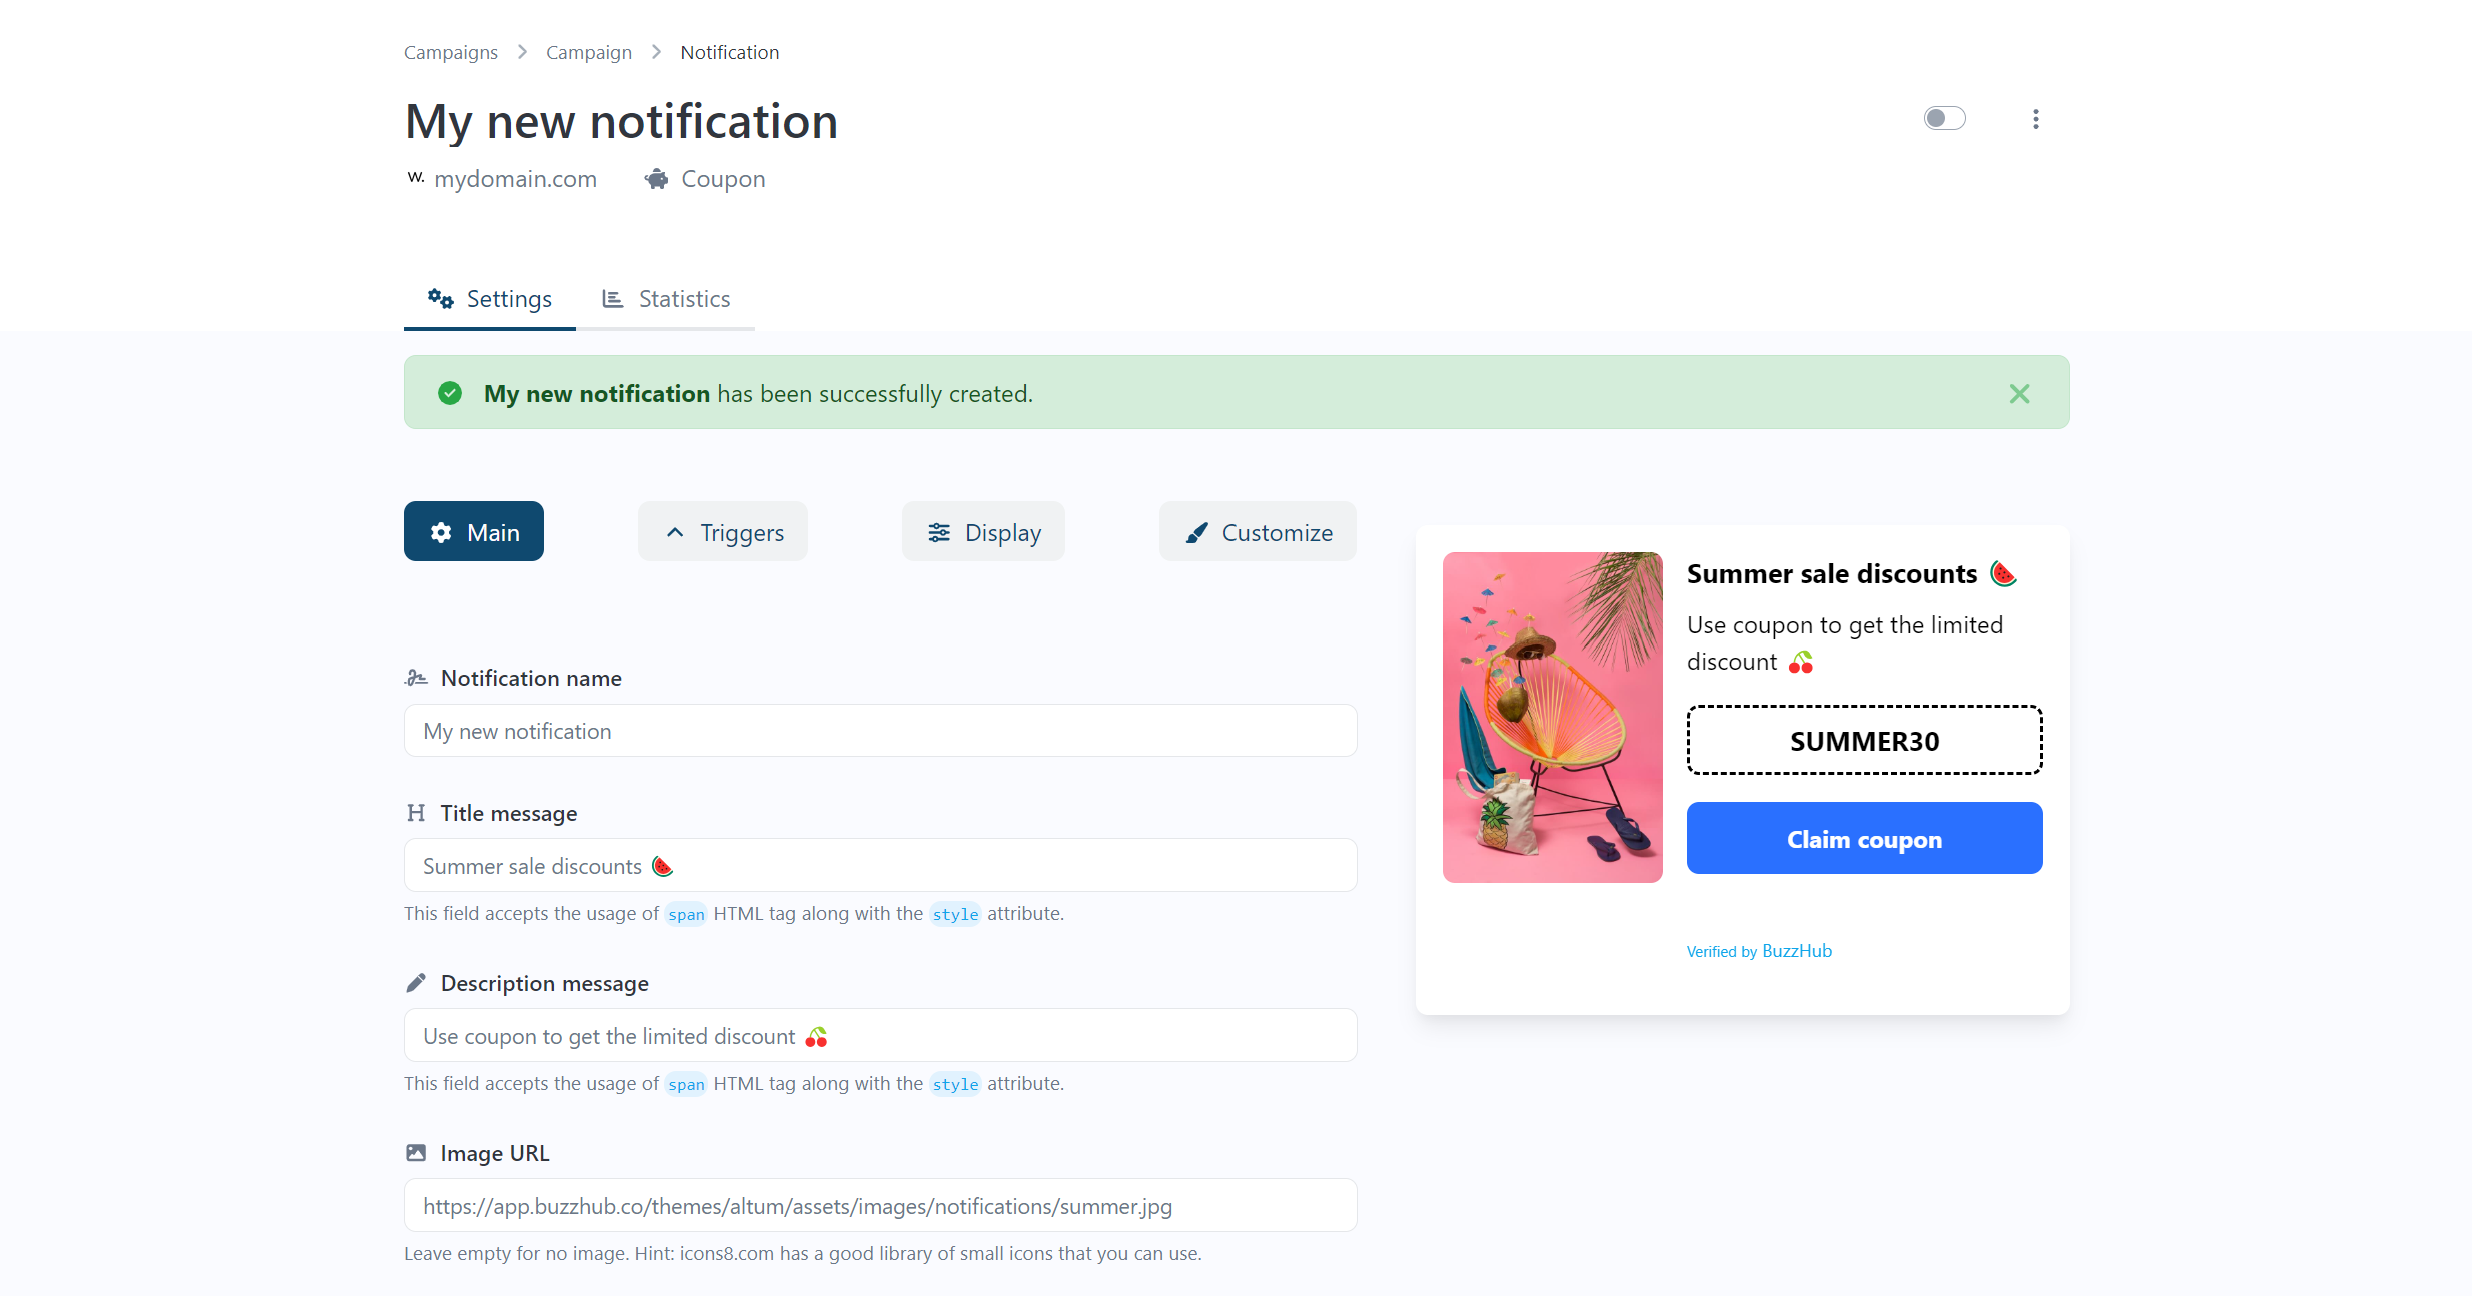
- Name the Popup: Give your popup a name for easy identification.
- Set the Title and Description: Enter a title and description. Use dynamic variables to personalize the message with user details.
- Add an Image: Optionally, add a custom image to your popup for more visual appeal.
- Update: Click “Update” to save your changes.
Note: Depending on your notification of choice, you may have more options here. For example, adding a coupon code if you are using a coupon code popup, or adding button URL's if your popup contains buttons. These are all self-explanatory, but please reach out to support if you need help.
Step 6: Configure Popup Triggers
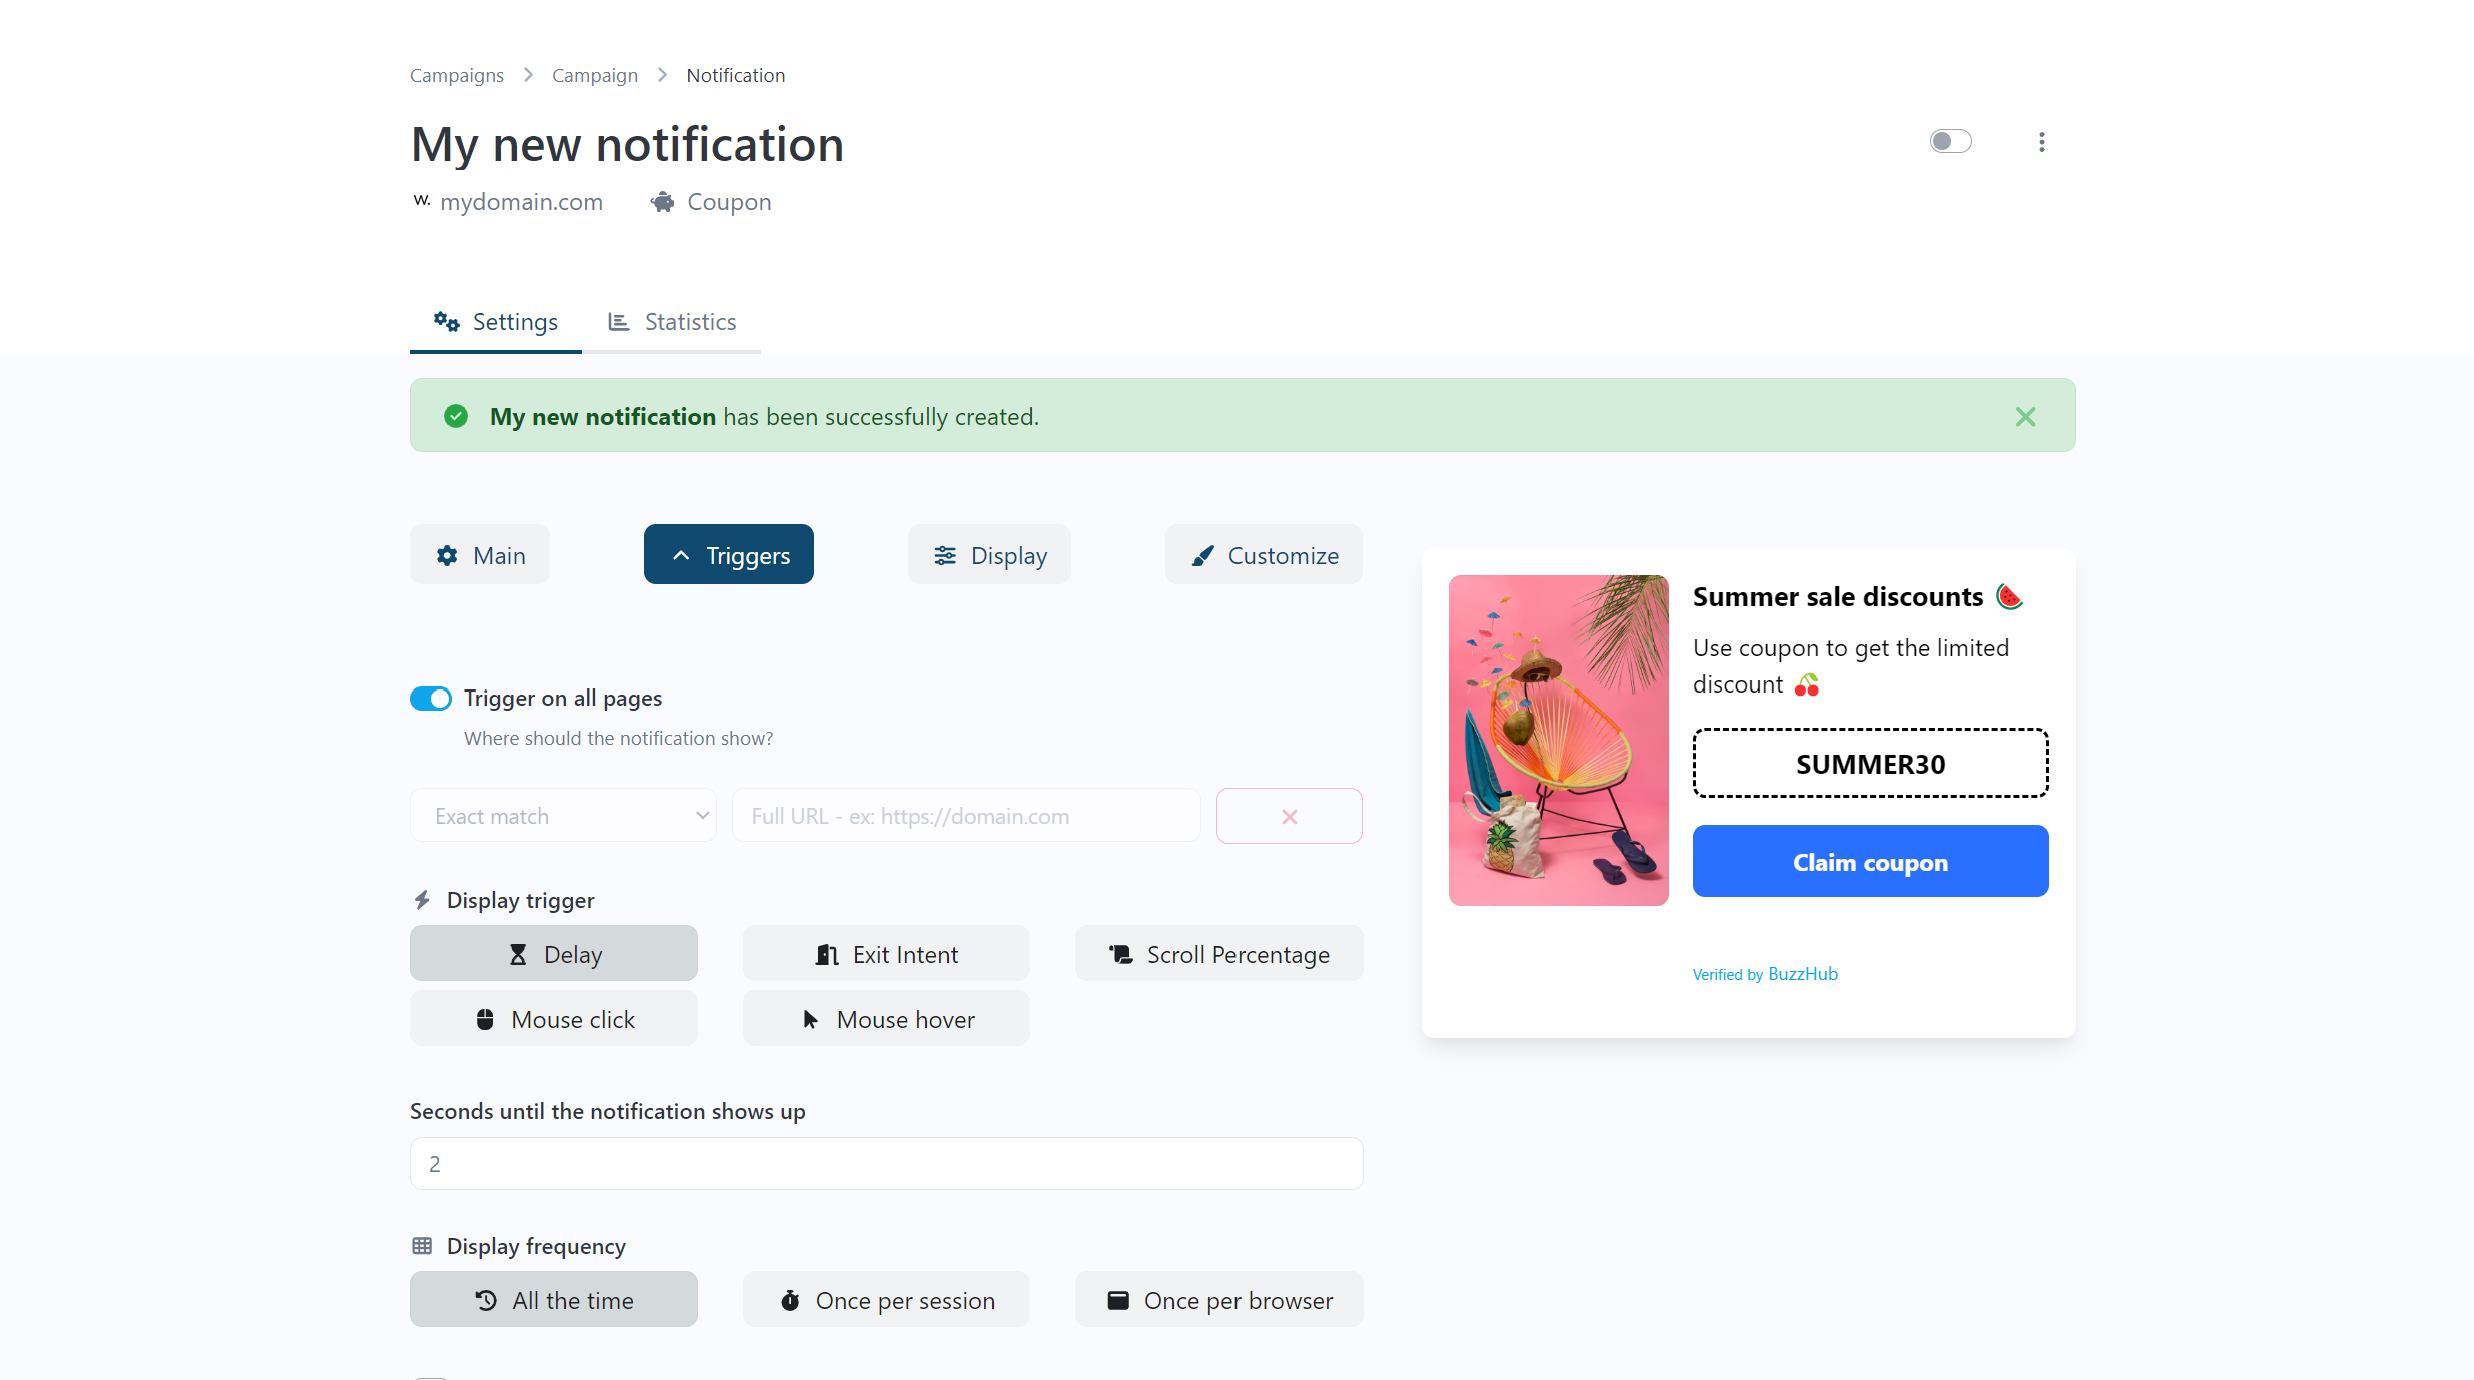
- Set Triggers: Decide when and where the popup should appear. You can choose to display it on all pages, specific pages, or under certain conditions like when a user is about to leave the page or after a set amount of time.
- Define Display Options: Customize how the popup appears, such as its position on the screen and animations. You can also add a close button for user convenience.
- Update: Click “Update” to save your changes.
Step 7: Customize Display Settings
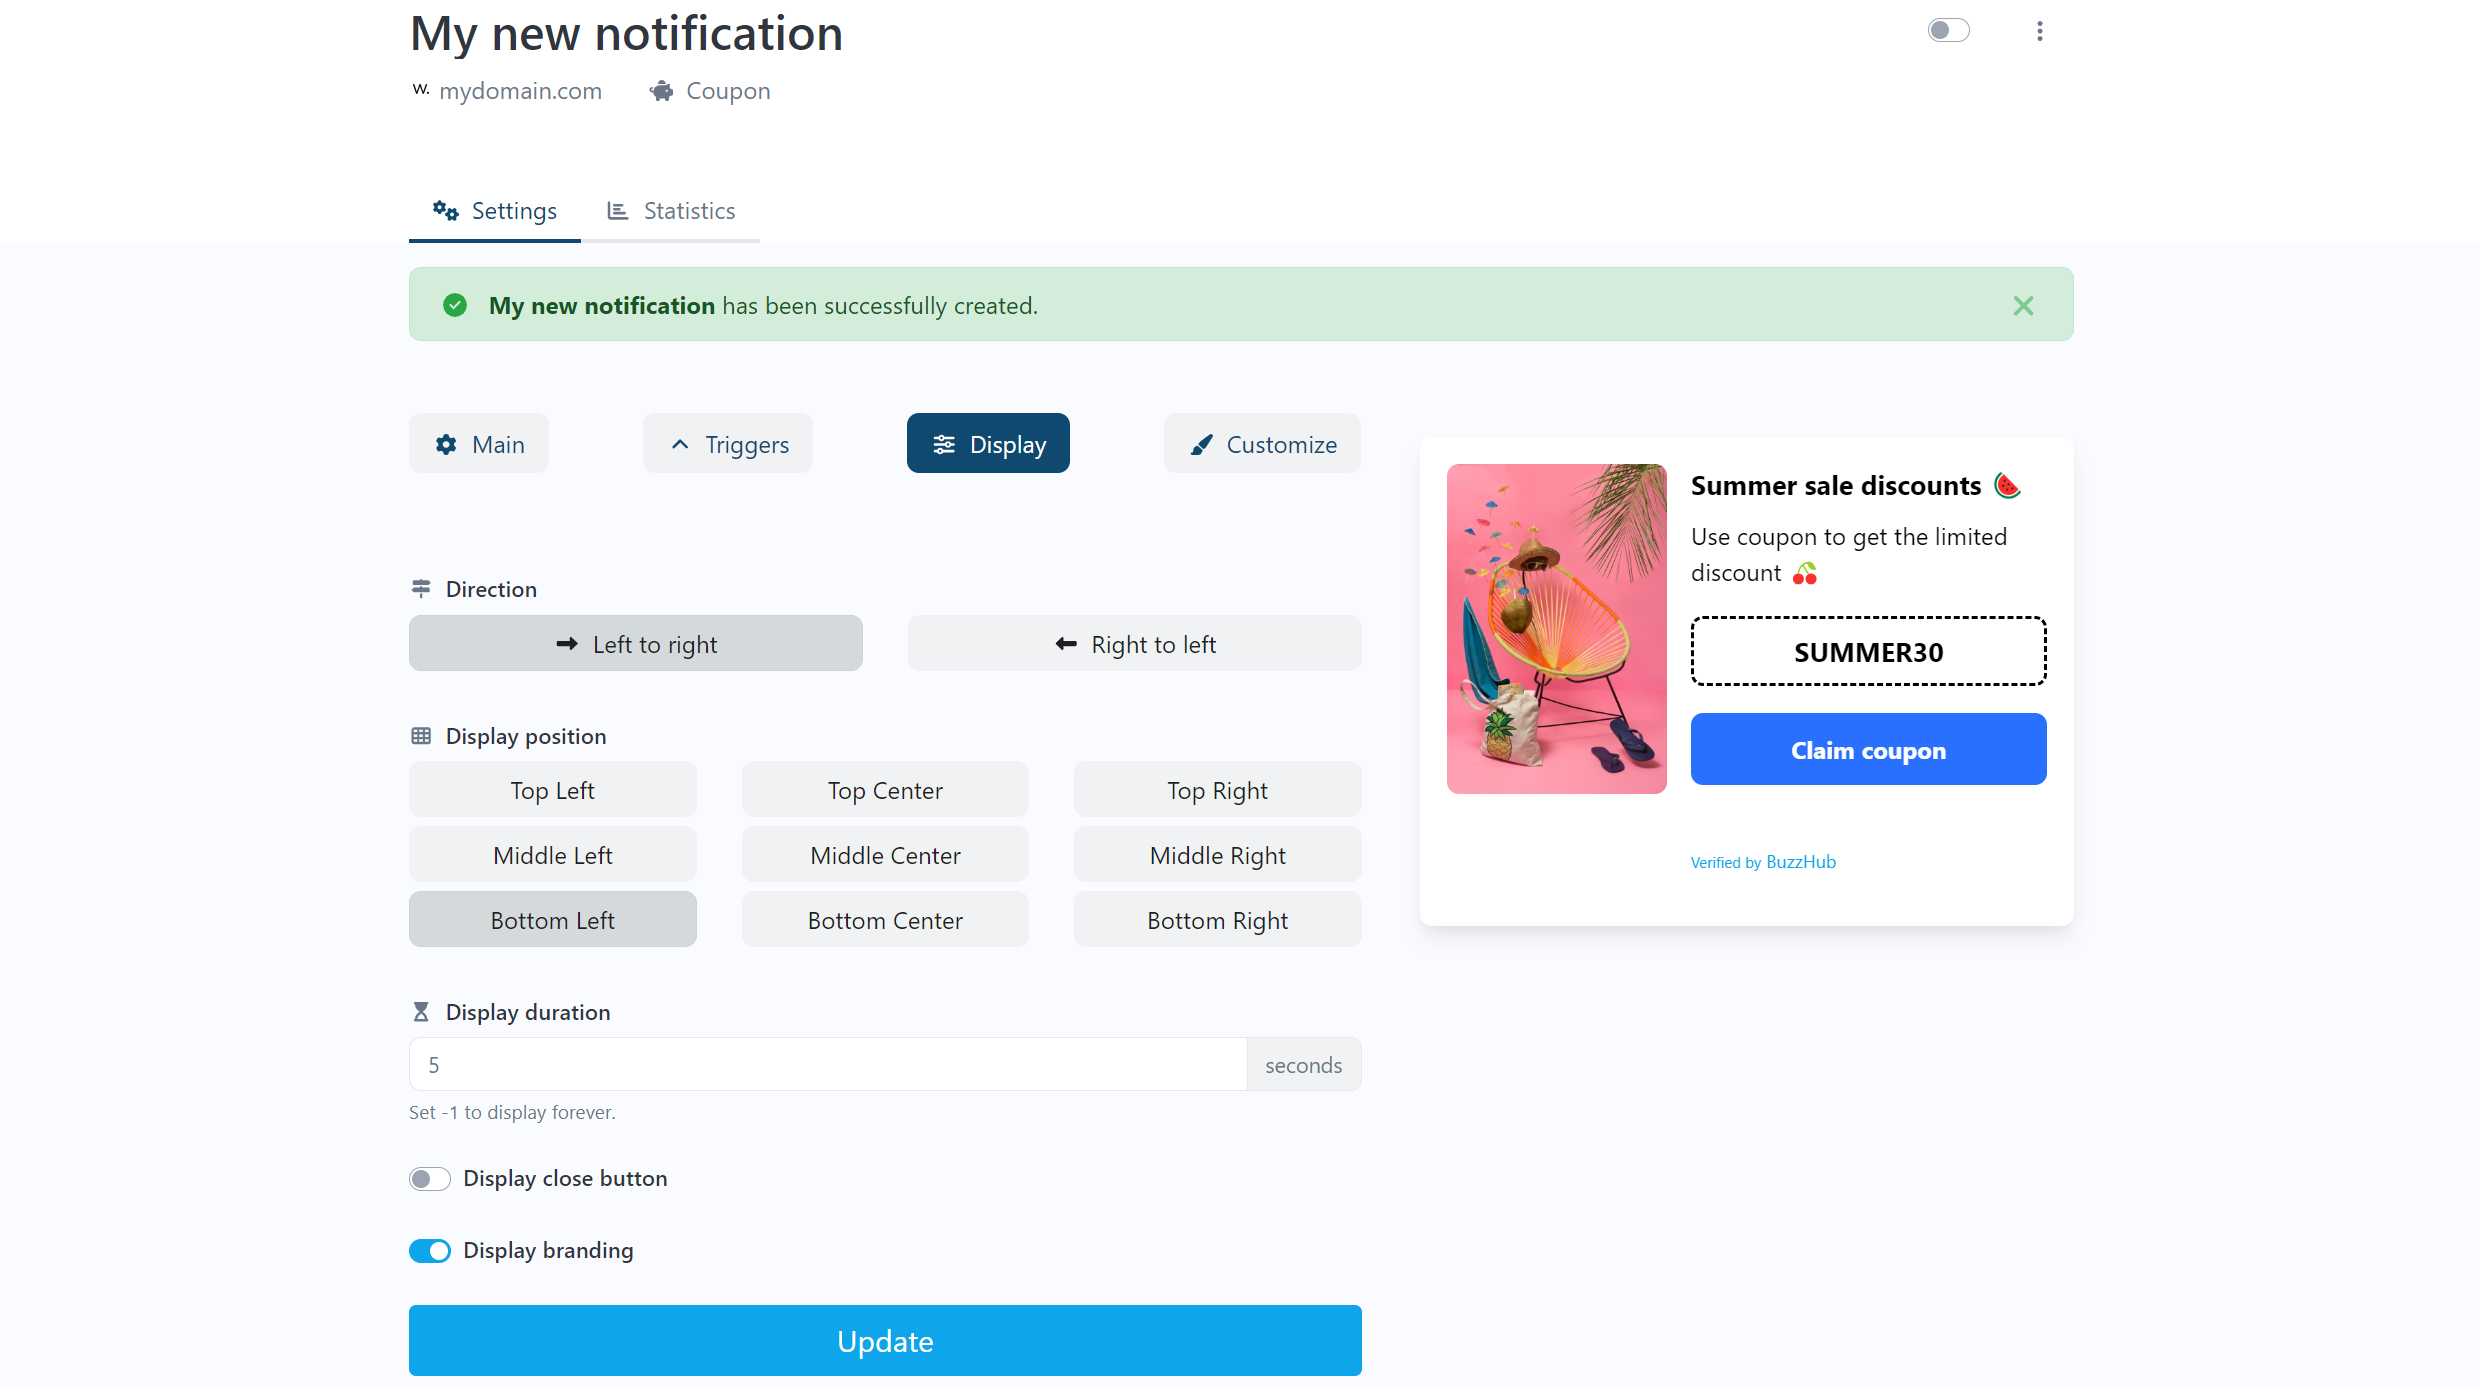
In this step, you can tailor how and where your popup will appear on your website to ensure it catches the eye of your visitors effectively. Here’s the options:
- Direction: Choose whether the popup slides in from the left or right.
- Position: Select where the popup appears on the screen (e.g., top left, bottom right).
- Duration: Set how long the popup stays visible (e.g., 5 seconds or until closed).
- Close Button: Toggle to allow users to close the popup.
- Branding: Show or hide BuzzHub branding.
- Update: Click “Update” to save your changes.
Step 8: Style Your Popup
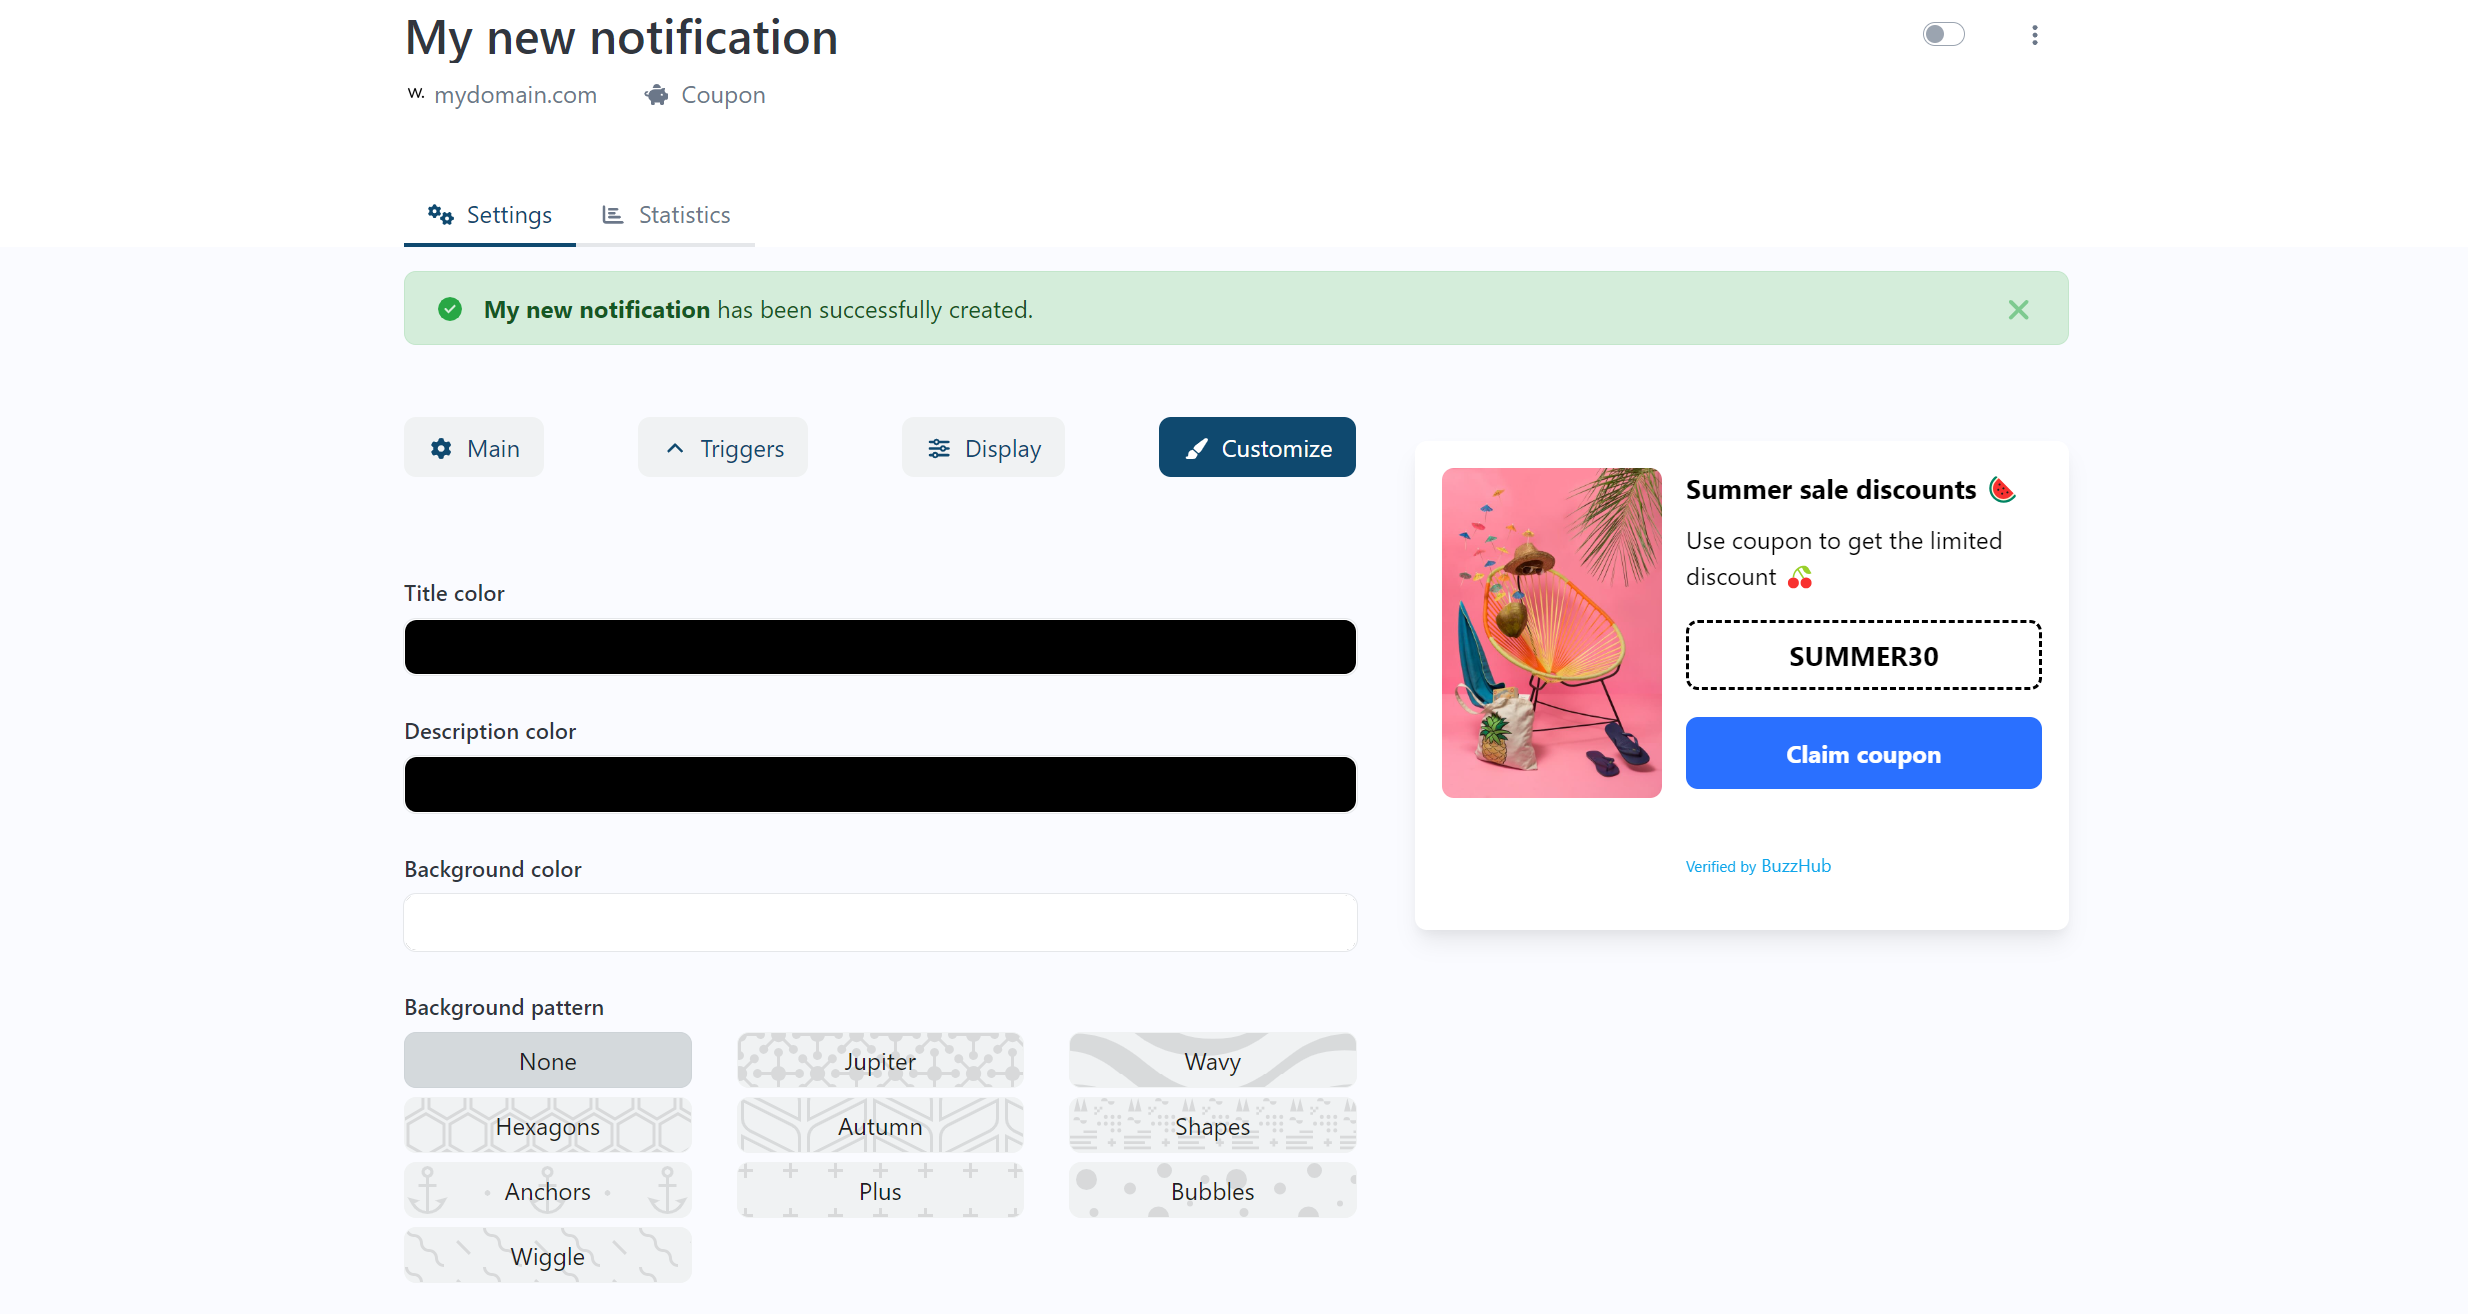
- Design the Appearance: Customize the popup’s background color, text, borders, fonts, and animations to match your website’s look and feel.
- Preview Changes: Preview your popup to see how it looks and make adjustments as needed.
- Update: Click “Update” to save your changes.
Step 9: Set Up Data Collection
Note: This step only applies to popups that collect live data, such as the conversions popup.
- Enable Data Integration: Use webhooks or the auto-capture feature to send data from your website to BuzzHub. This allows the popup to update dynamically with real user actions like purchases or sign-ups.
Step 10: Go Live
- Activate the Popup: Once everything is set up, you can activate the popup in the top right of the notification editor. Once your pixel has been added to your website and the notification is activated, your popups will start appearing on your website. This process is quick and can take as little as five minutes.
Need Help?
If you need assistance, please reach out to support via [email protected]