Follow these simple steps to add the BuzzHub Pixel to your WordPress site using the free Insert Headers and Footers plugin by WPCode. This will help you integrate BuzzHub notifications seamlessly into your website.
Step 1: Install the Plugin
- Log into your WordPress Dashboard: Access your WordPress admin area by logging in.
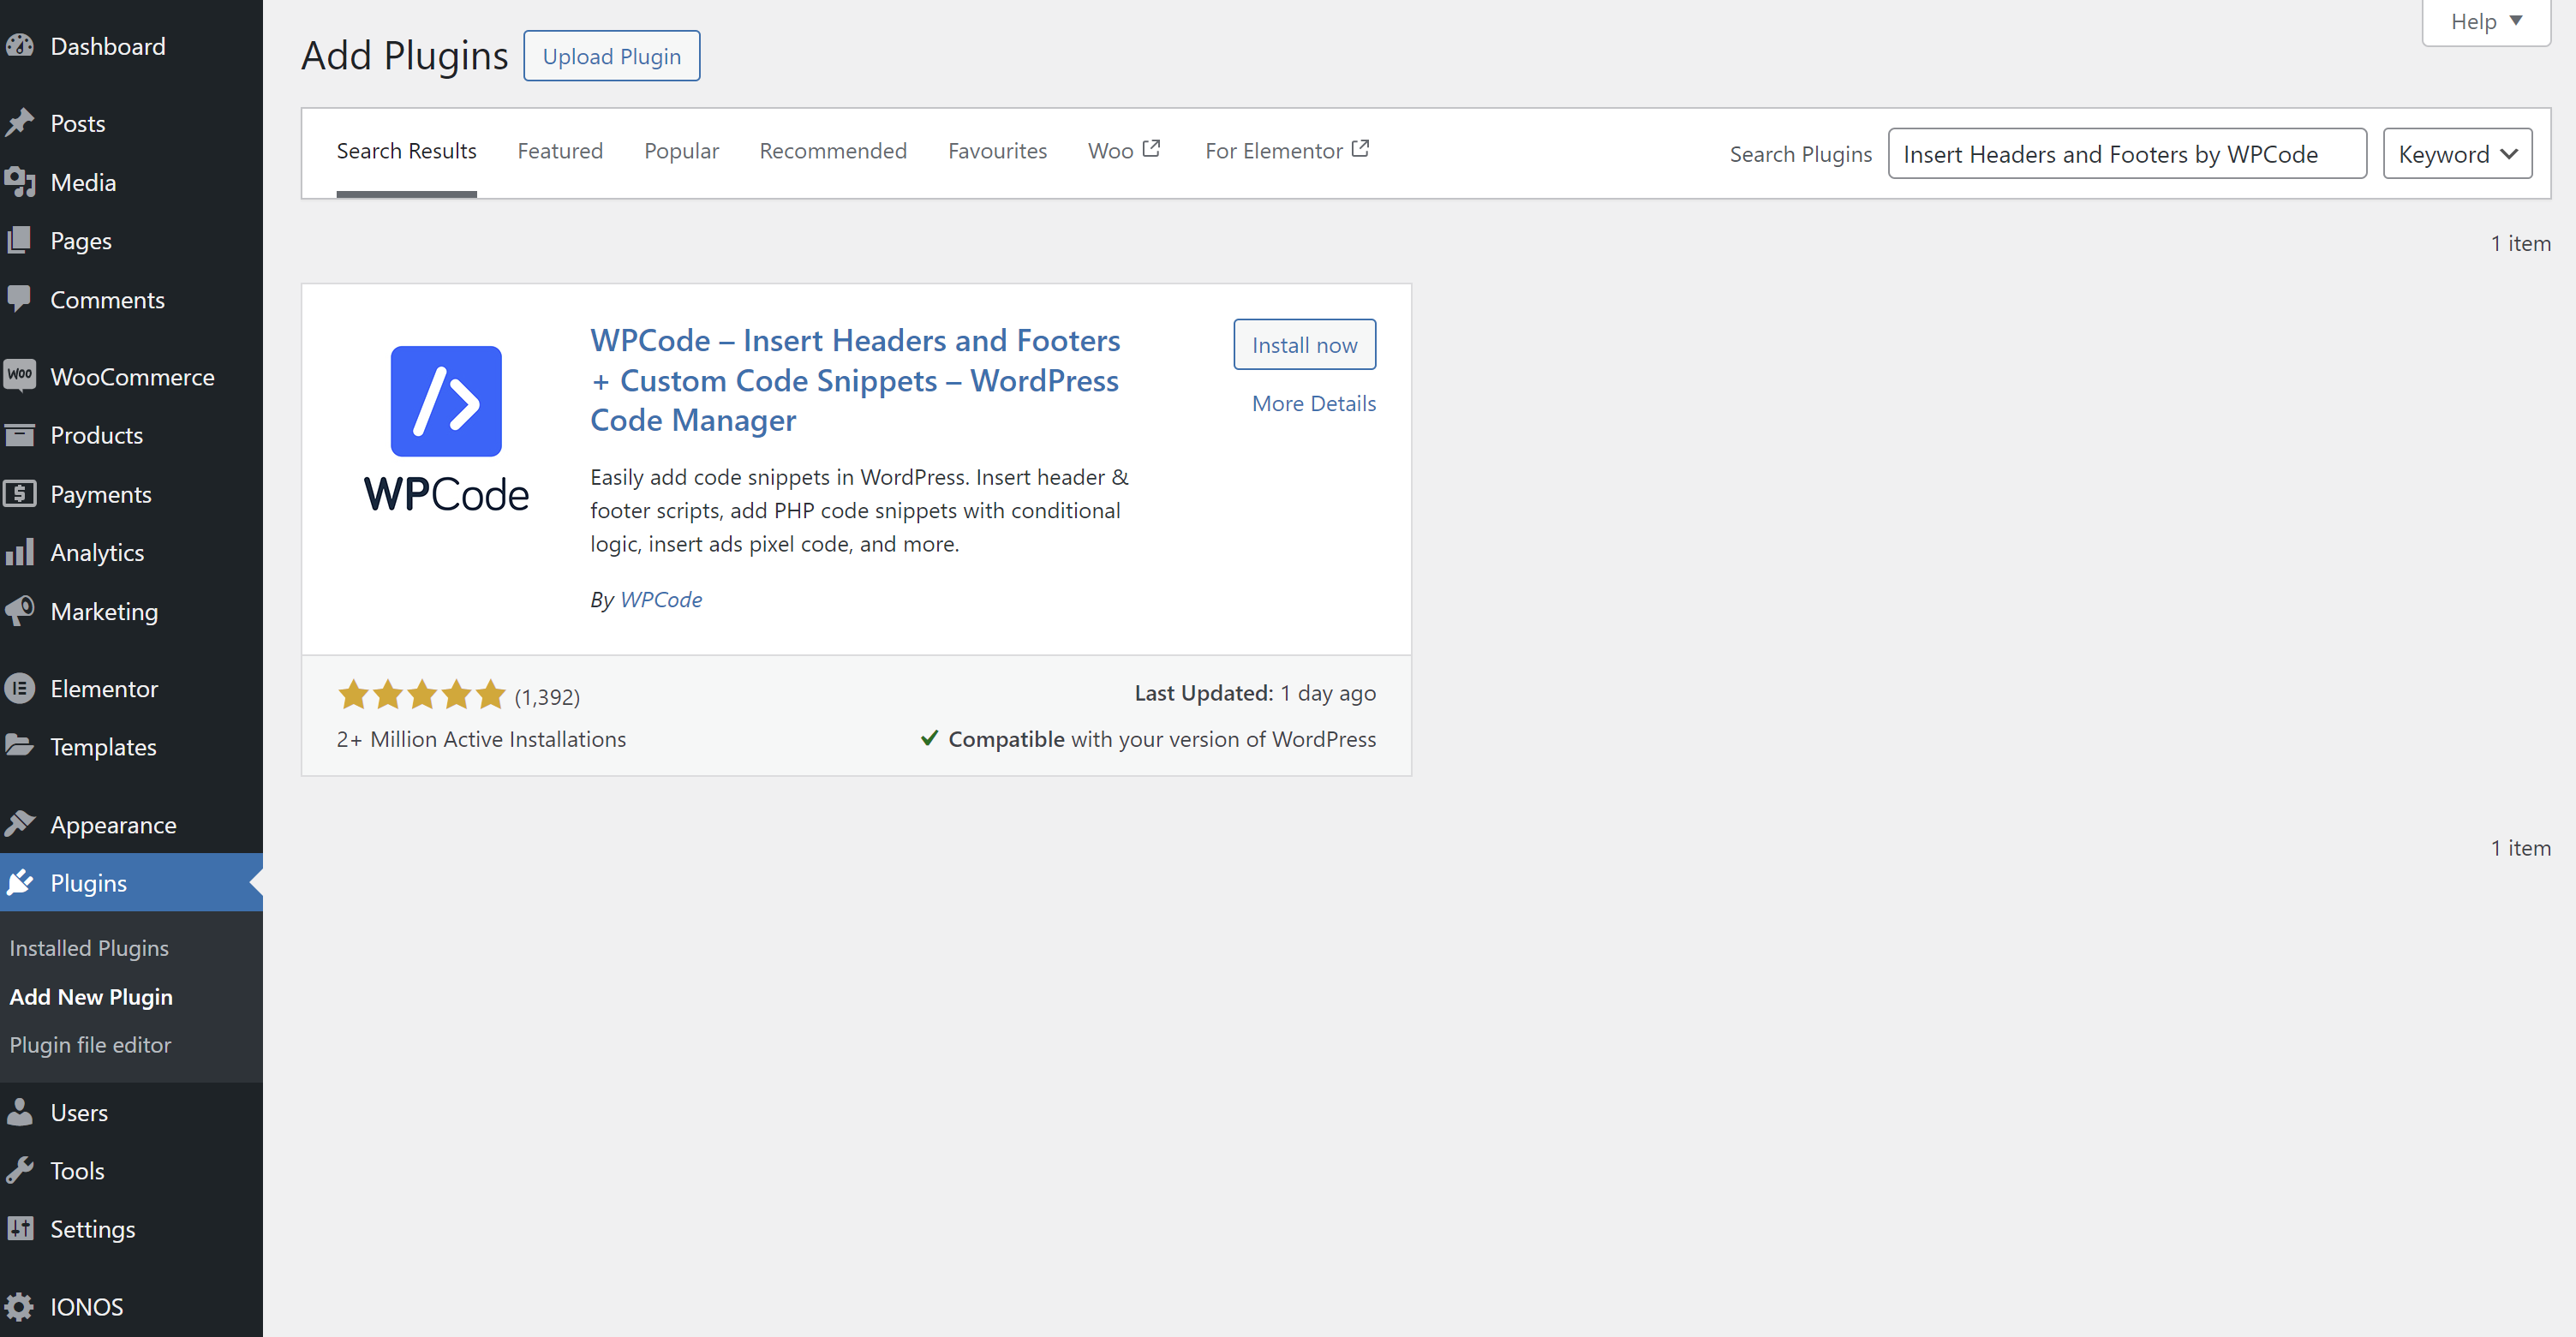
- Go to Plugins: On the left-hand menu, click on “Plugins” and then select “Add New.”
- Search for the Plugin: In the search bar, type “Insert Headers and Footers by WPCode”
- Install the Plugin: Click on the “Install Now” button next to the Insert Headers and Footers plugin.
- Activate the Plugin: After installation, click on the “Activate” button to enable the plugin on your site.

Step 2: Access the Plugin Settings
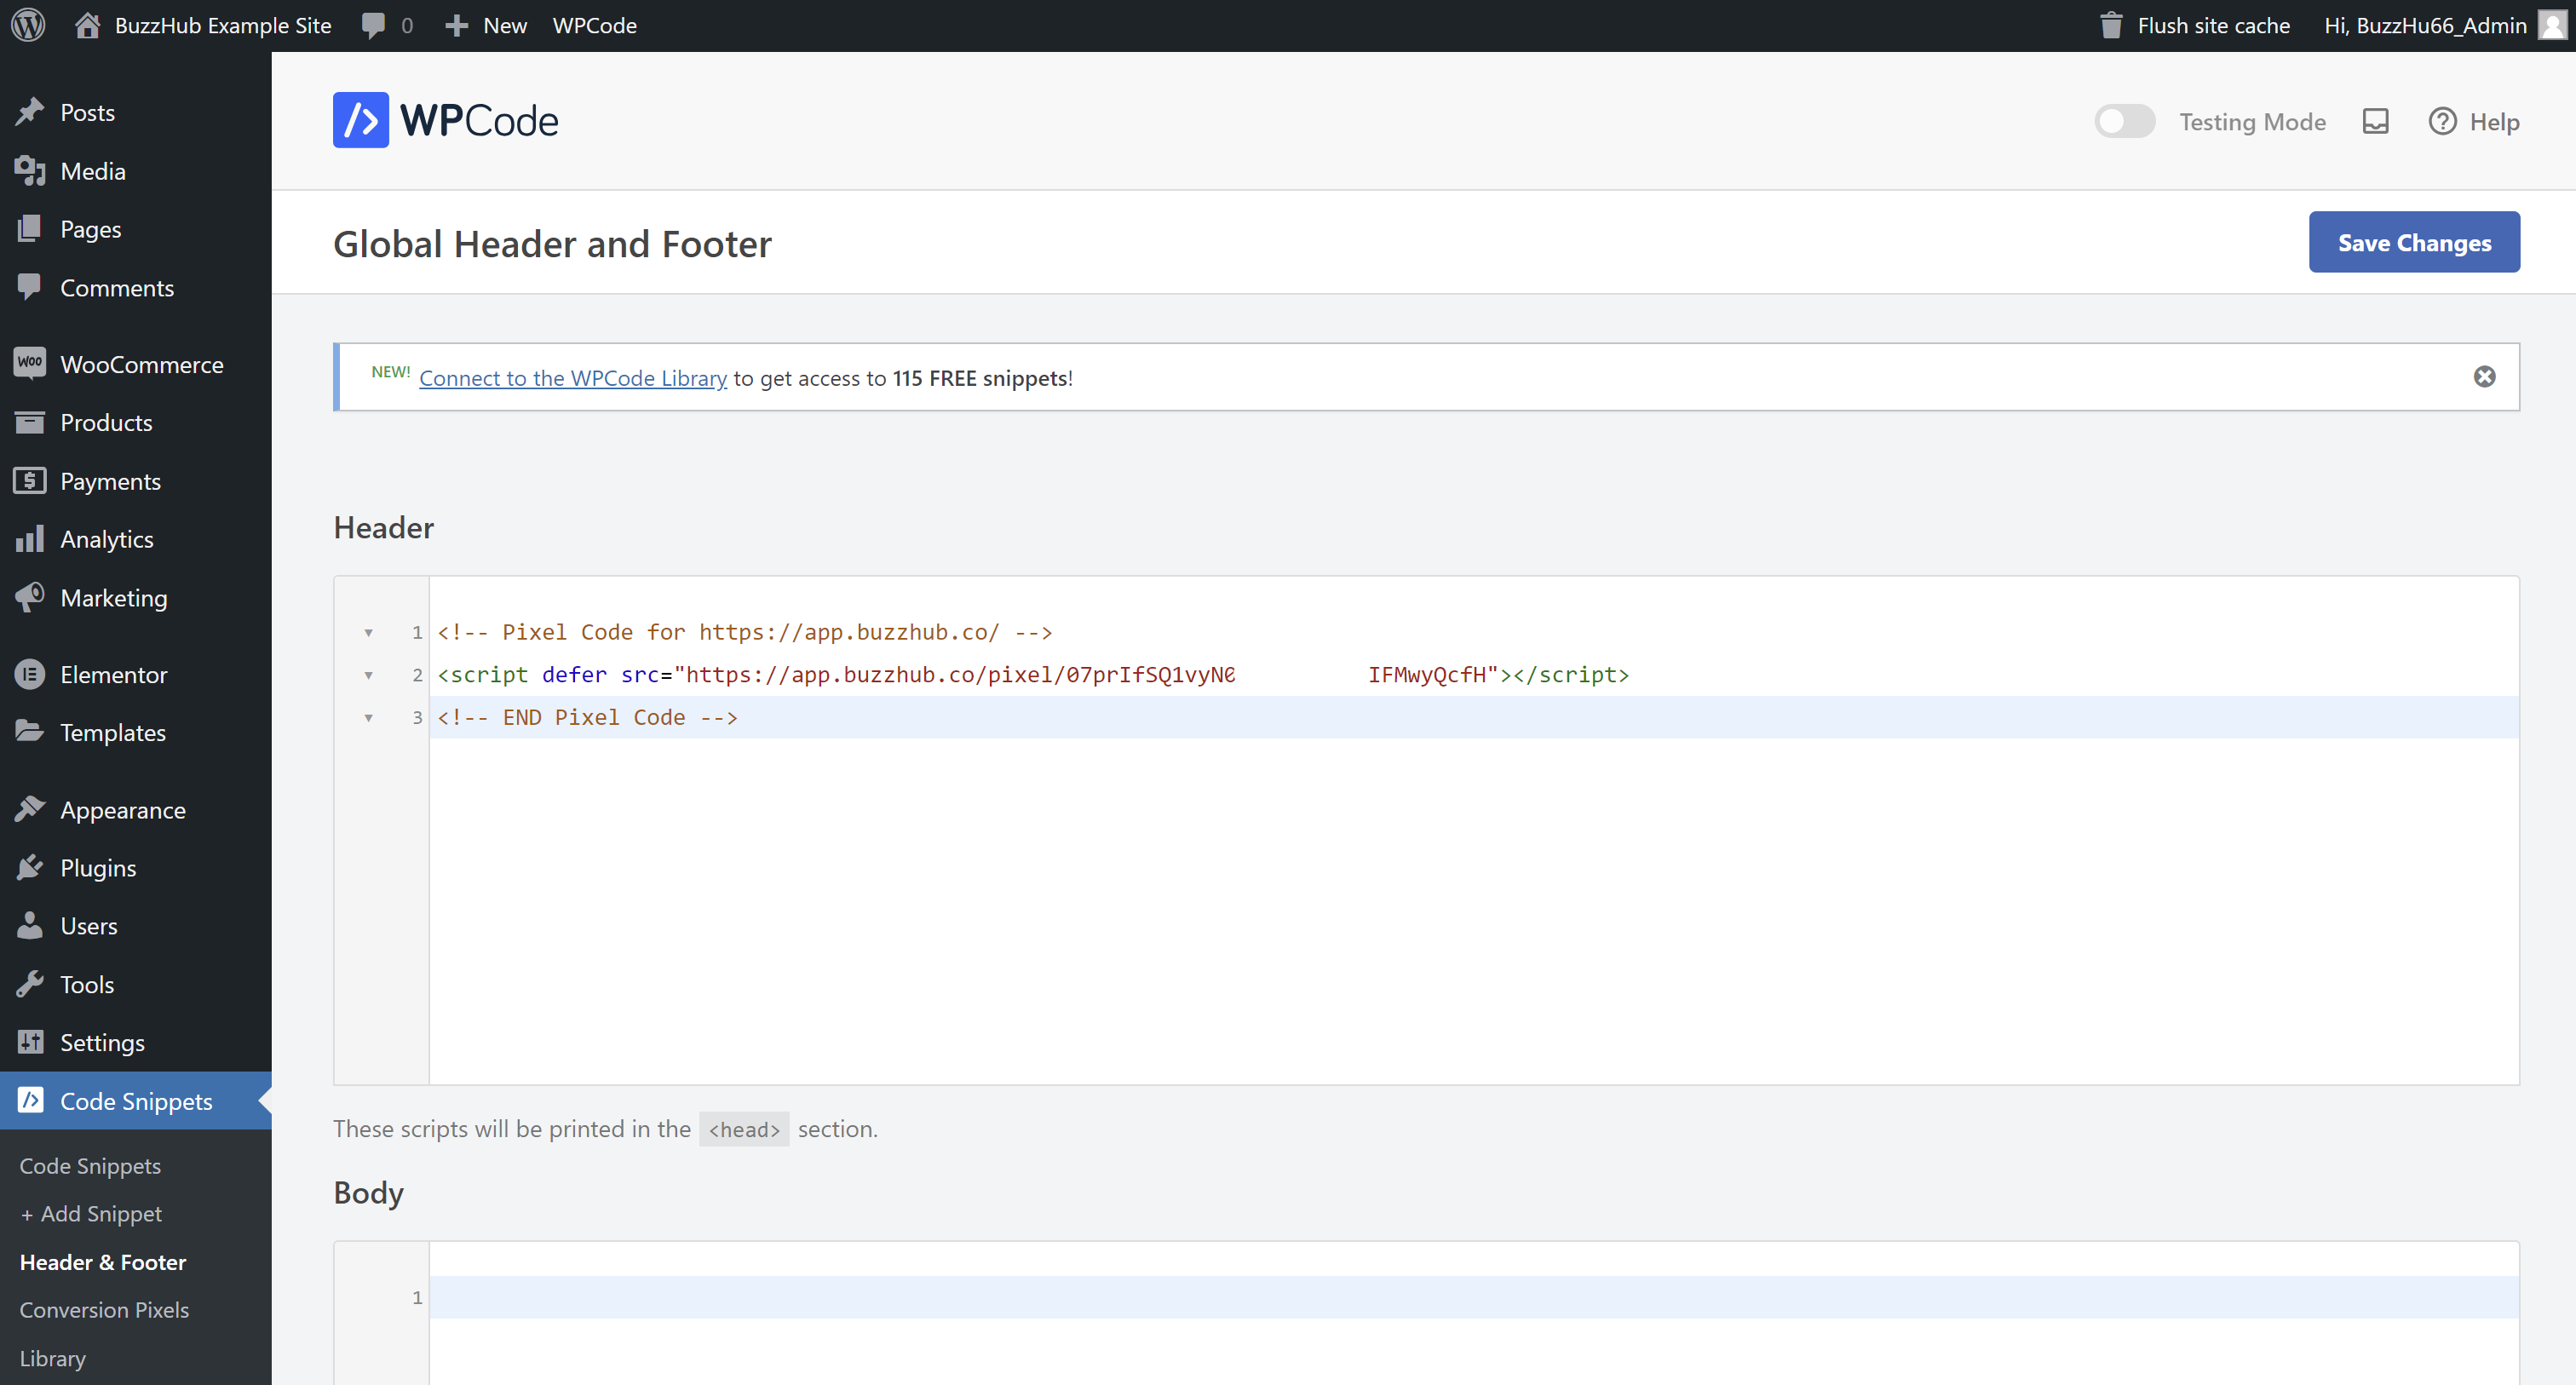
- Navigate to Code Snippets: On the left-hand side of your dashboard, go to “Code Snippets” and then click on “Header & Footer.”
Step 3: Add the BuzzHub Pixel Code
- Paste the Code: In the Header box, paste the BuzzHub Pixel code that you copied from your BuzzHub dashboard.
- Save Changes: Click the “Save Changes” button to ensure the code is properly added to your site’s header.
