This guide will walk you through the process of connecting your WooCommerce store with BuzzHub, allowing you to send real-time sales data to BuzzHub for creating impactful social proof notifications. By following these steps, you will be able to display dynamic notifications such as recent purchases, helping to boost credibility and conversion rates on your site.
Step 1: Create a BuzzHub Campaign and Notification
- Log in to your BuzzHub account.
- Navigate to the "Campaigns" section and create a new campaign. Name it appropriately, such as "WooCommerce Sales Data."
- Set up a new notification within this campaign:
- Choose the "Conversion Notification" type.
Step 2: Copy the Webhook URL from BuzzHub
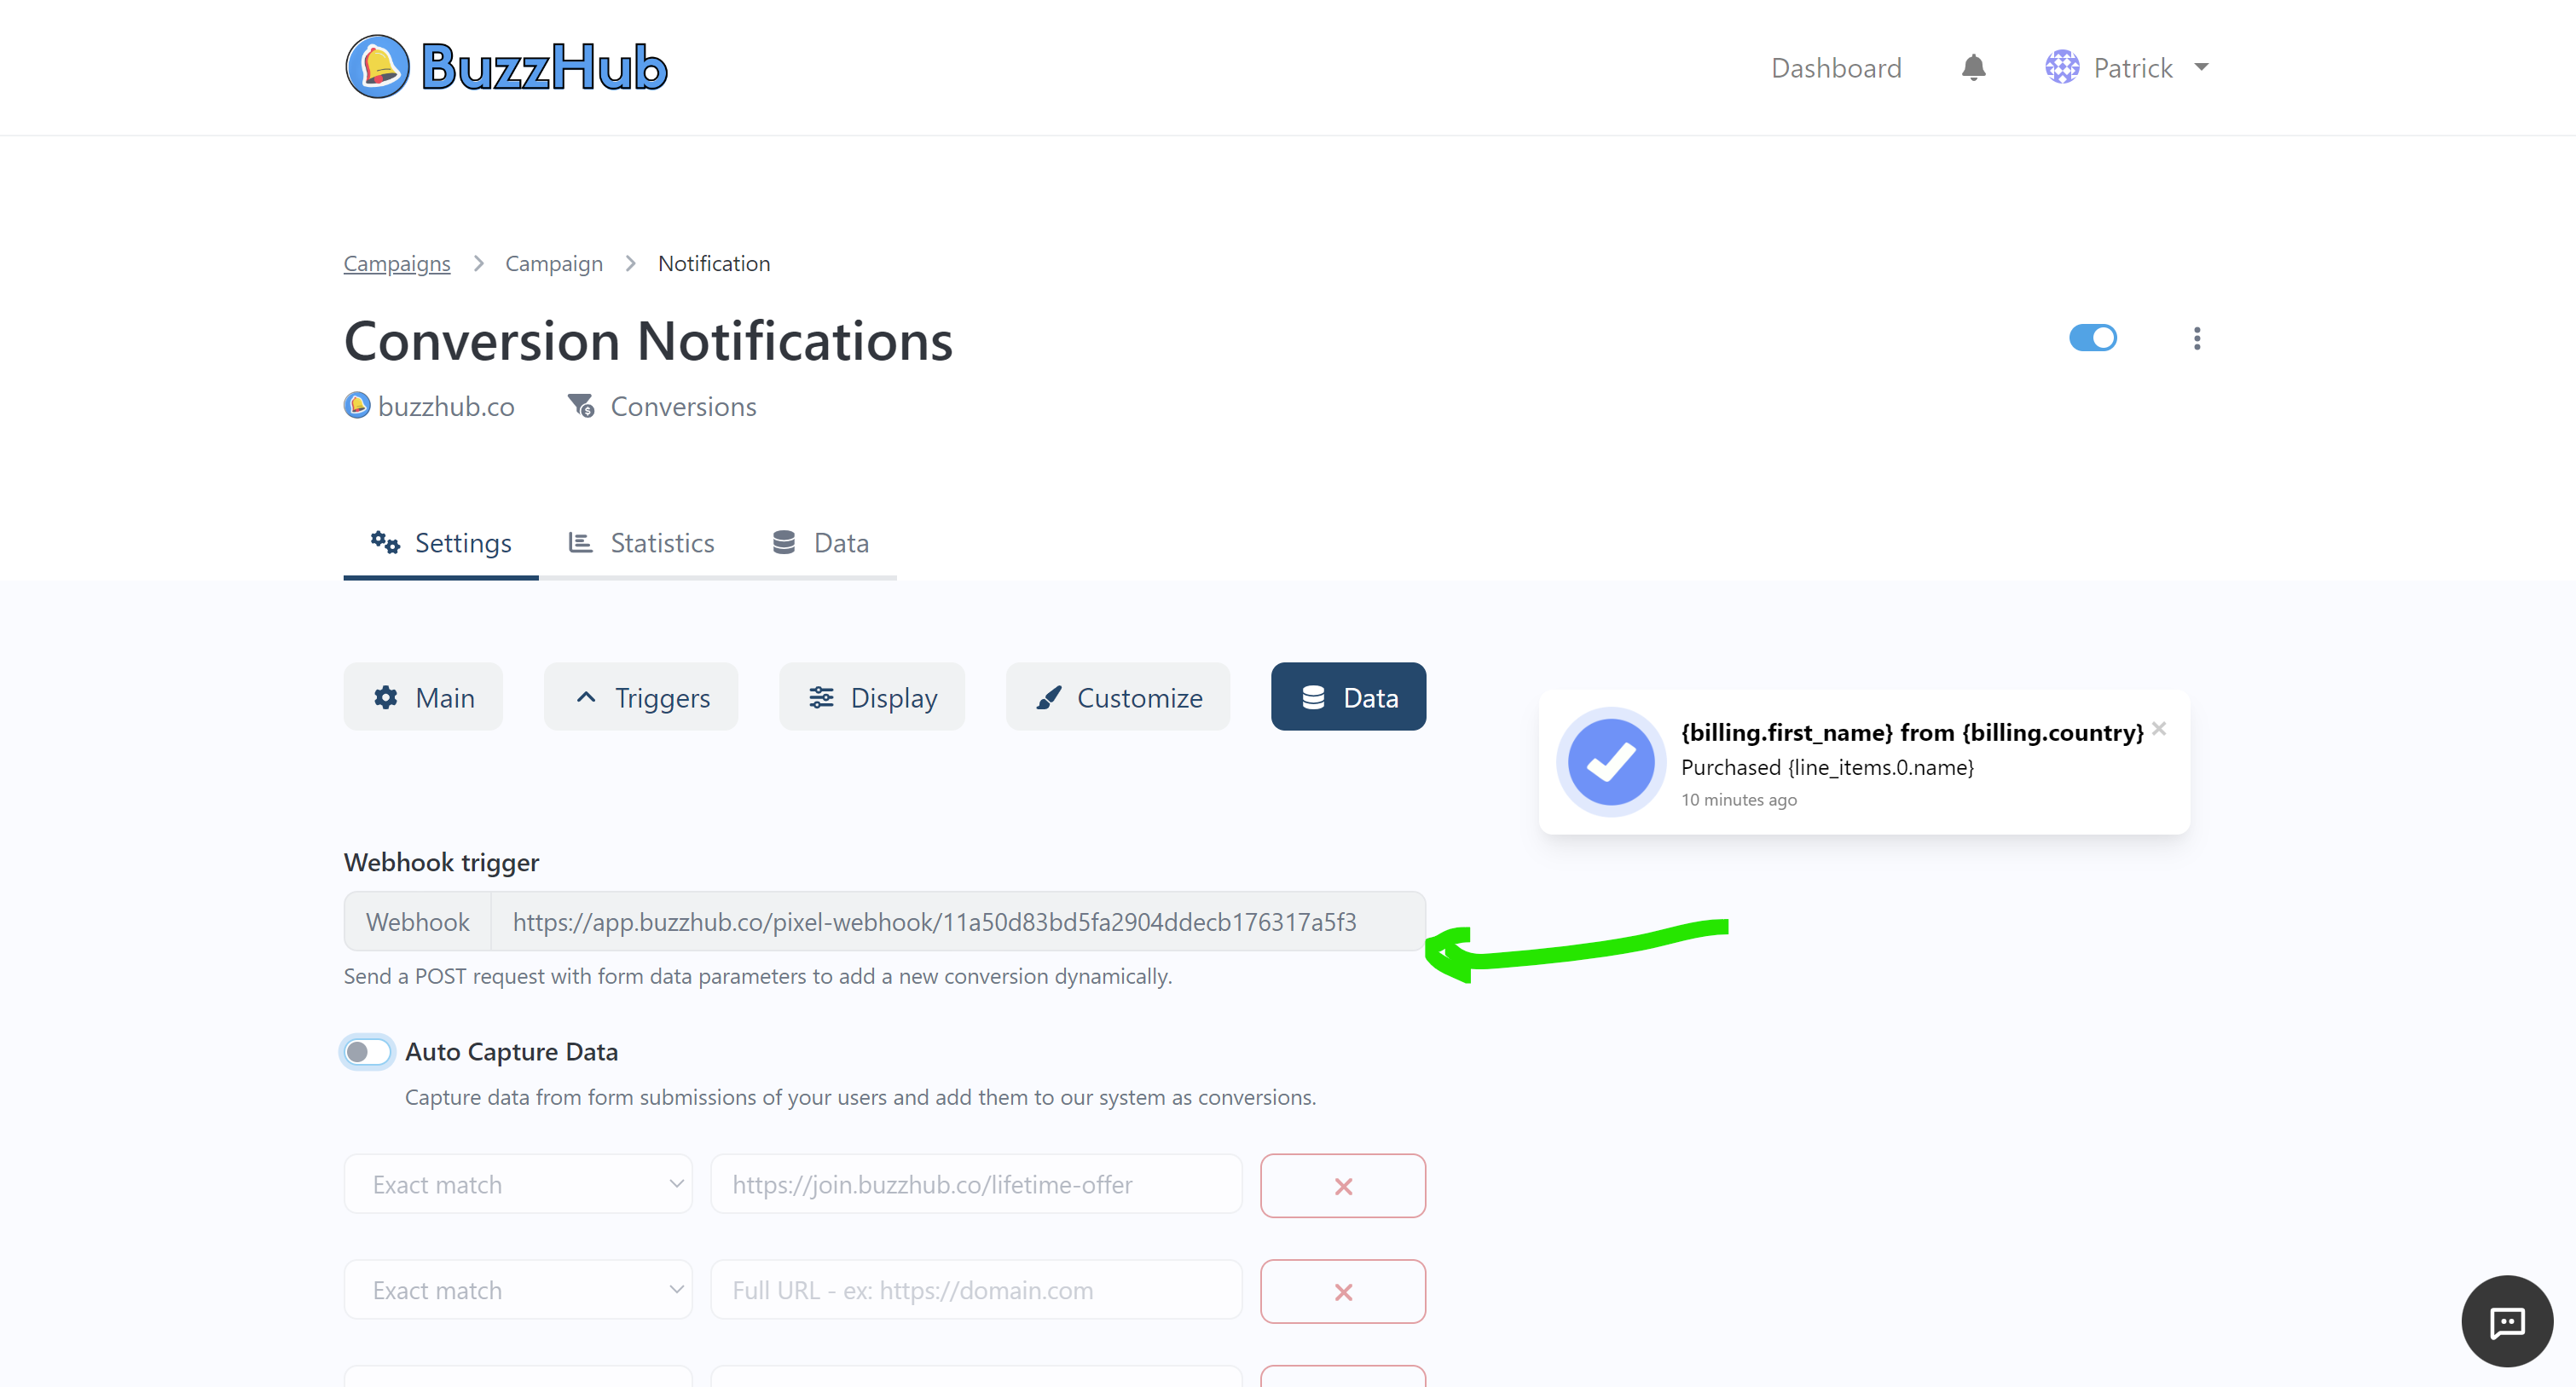
- After setting up your notification, go to the "Data" tab within the notification settings in BuzzHub.
- Copy the Webhook URL provided. This URL is necessary for linking your WooCommerce store with BuzzHub.

Step 3: Set Up a Webhook in WooCommerce
- Log in to your WooCommerce admin dashboard.
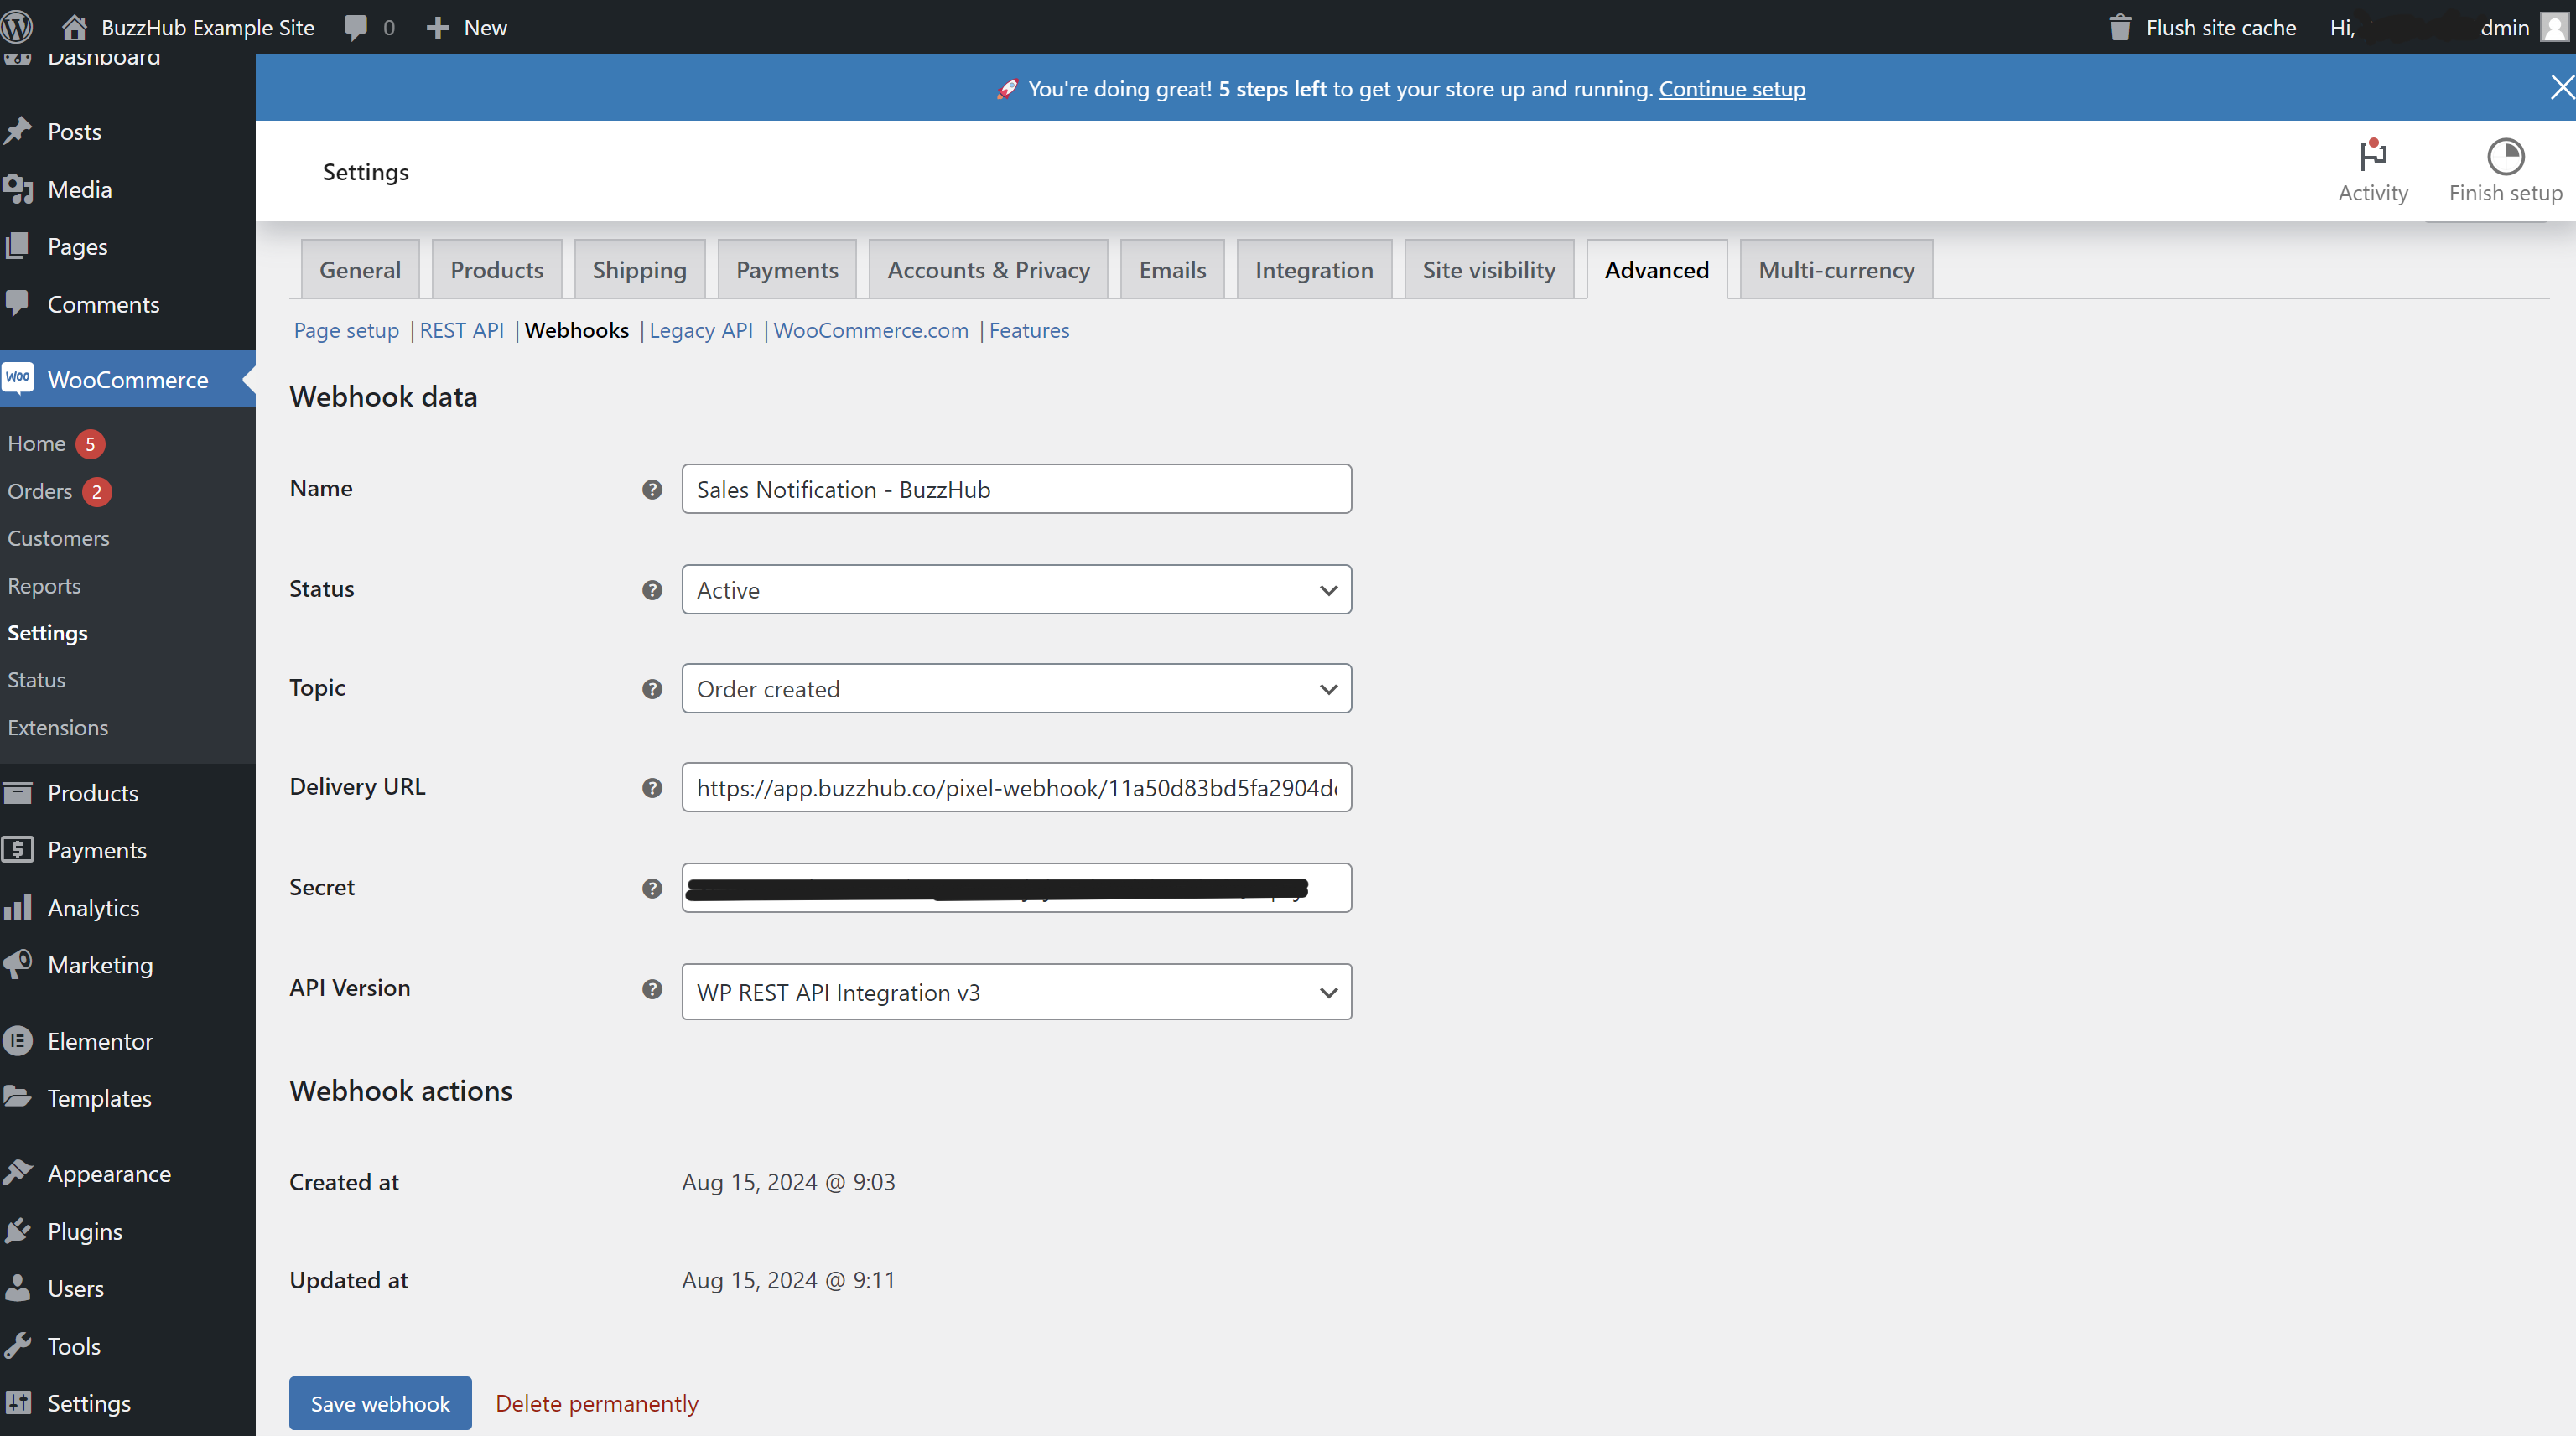
- Navigate to "WooCommerce" > "Settings" > "Advanced" > "Webhooks."
- Click on "Add Webhook" to create a new webhook:
- Name the webhook (e.g., "BuzzHub Sales Data").
- Set the status to "Active."
- Choose "Order created" as the topic to trigger the webhook when a new order is placed.
- Paste the Webhook URL from BuzzHub into the "Delivery URL" field.
- Leave the "Secret" field blank. A key will automatically be generated.
- Ensure the API version is set to "WP REST API Integration v3." or whatever the latest version is.
- Save the webhook.

Step 4: Verify the Integration with a Test Sale
- Place a test order in your WooCommerce store to trigger the webhook.
- Return to BuzzHub and navigate to your campaign.
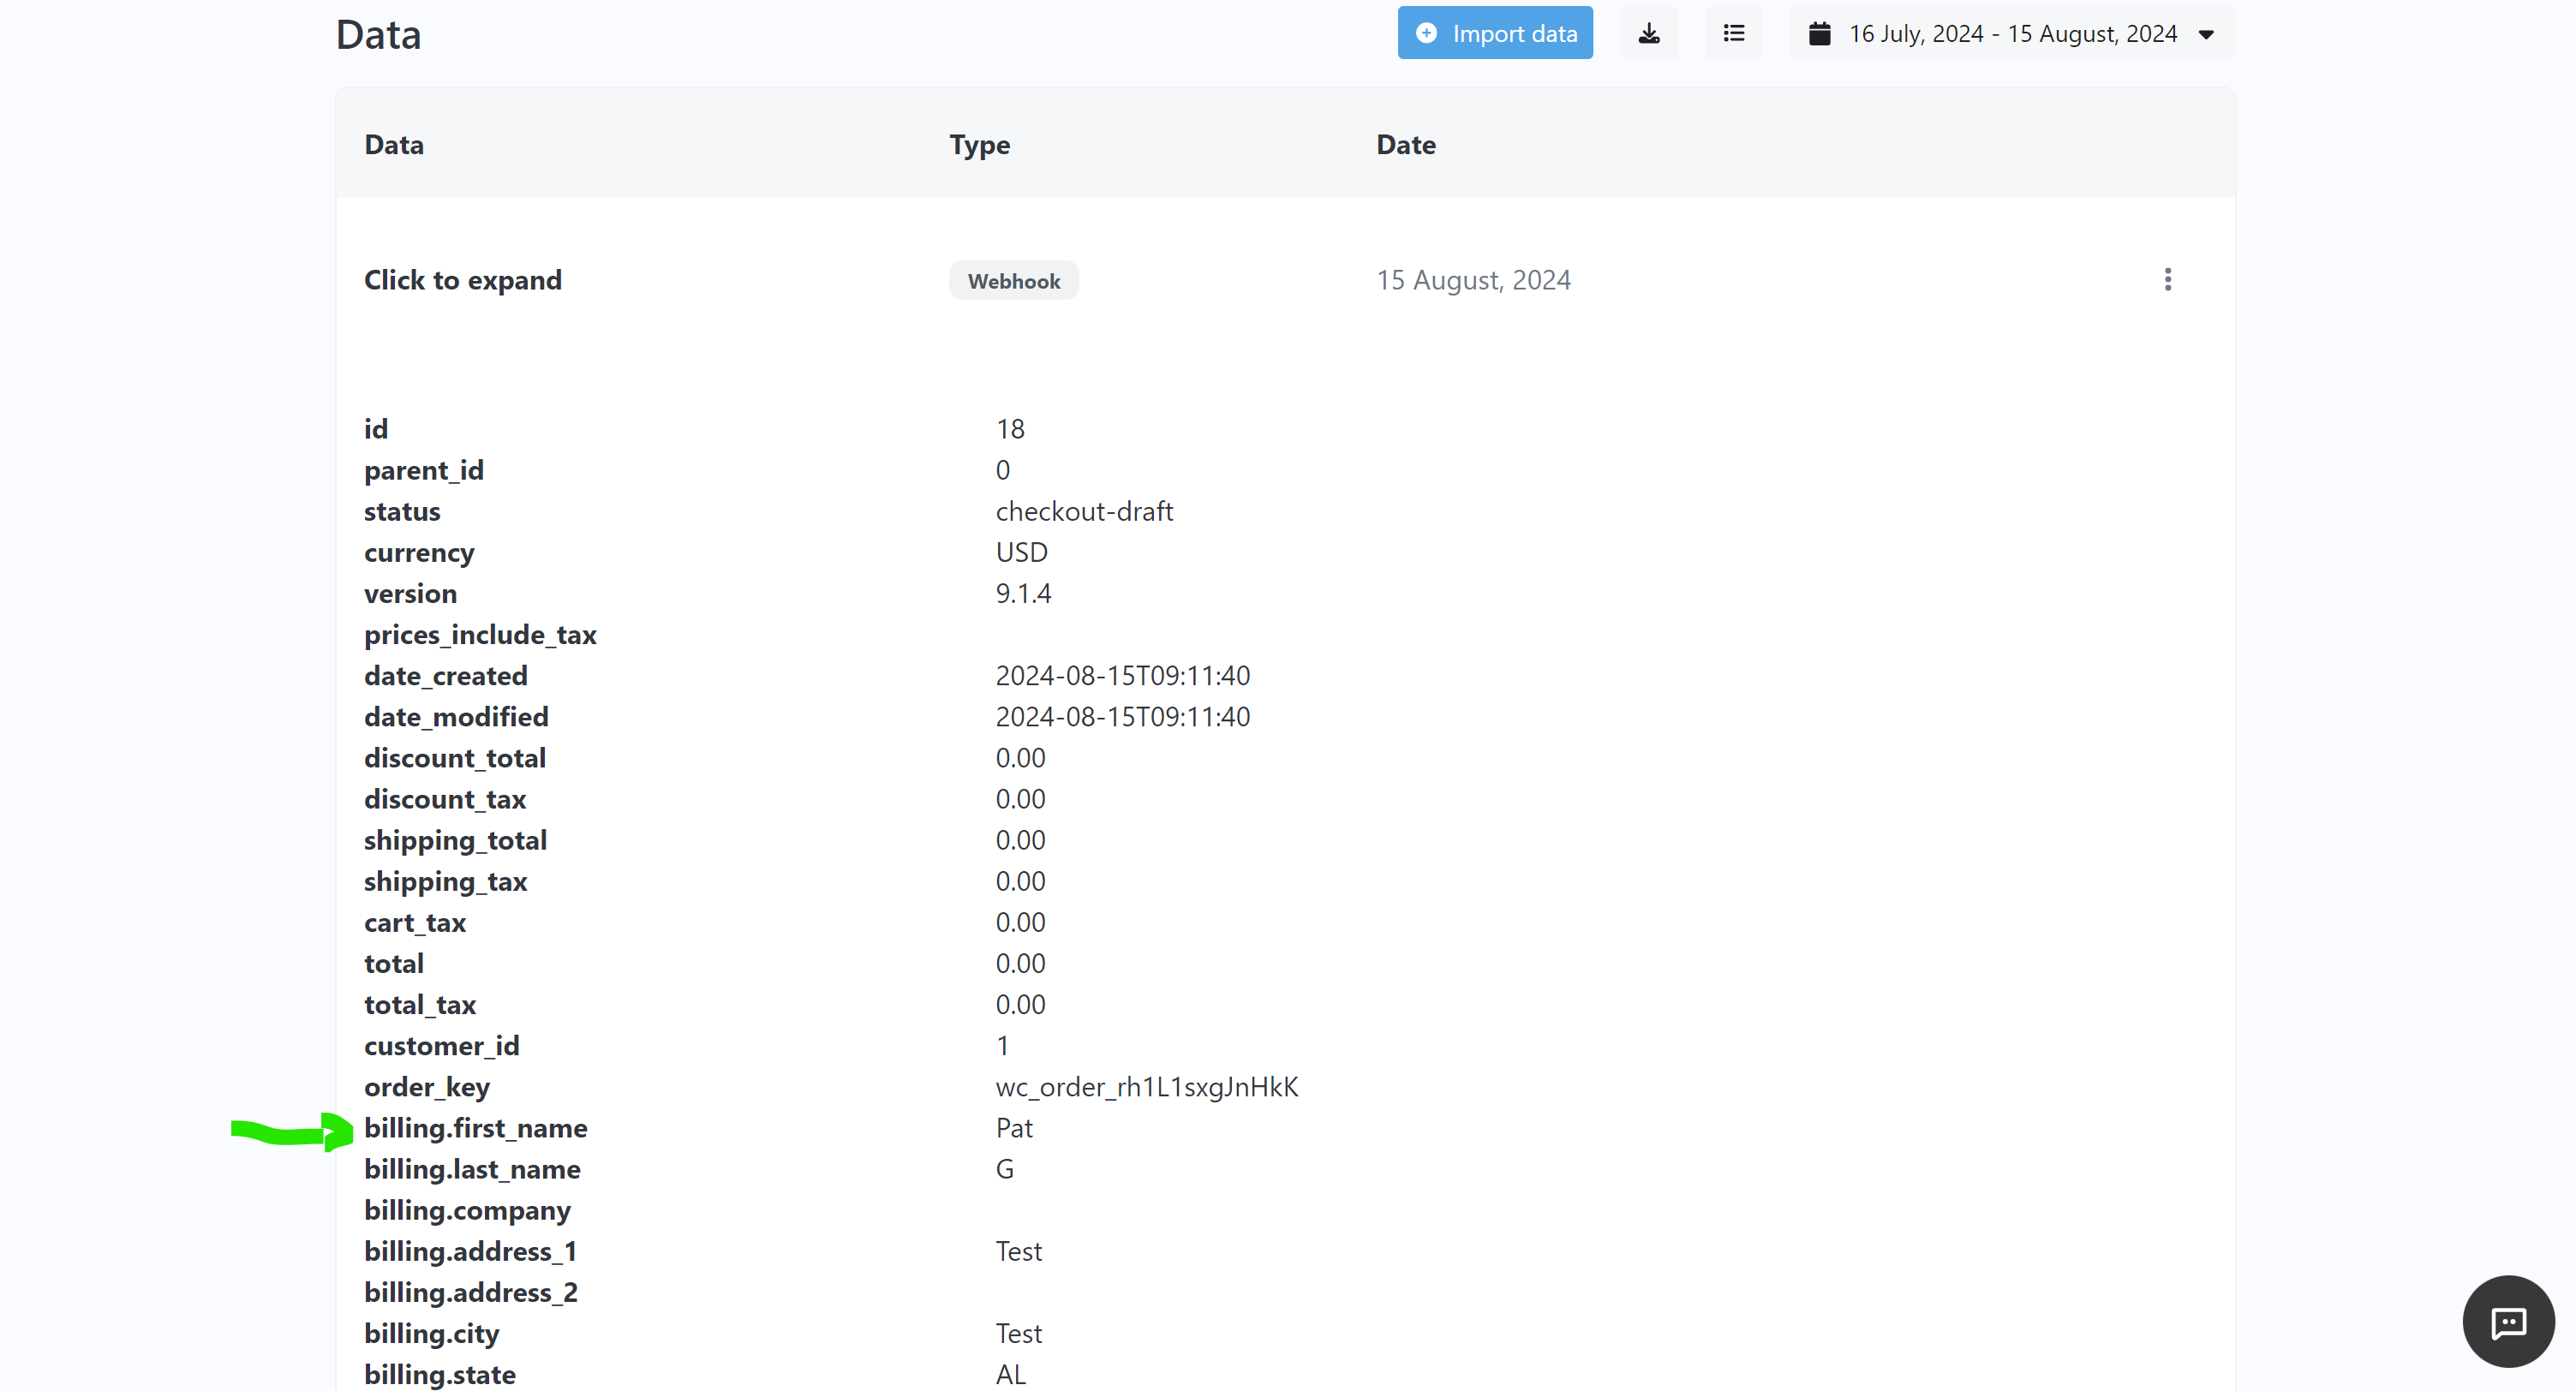
- Select the notification you set up and go to the "Data" tab.
- Check that the test sale data appears, including details like the customer's name and the product purchased.

Optional Step 5: Display the Sales Data Dynamically in Your Notification
After you've verified that the sales data is being sent from WooCommerce to BuzzHub, you can customize your notification to automatically display this information.
- In BuzzHub, go to the campaign where you set up your notification.
- Find the notification you created and open the settings.
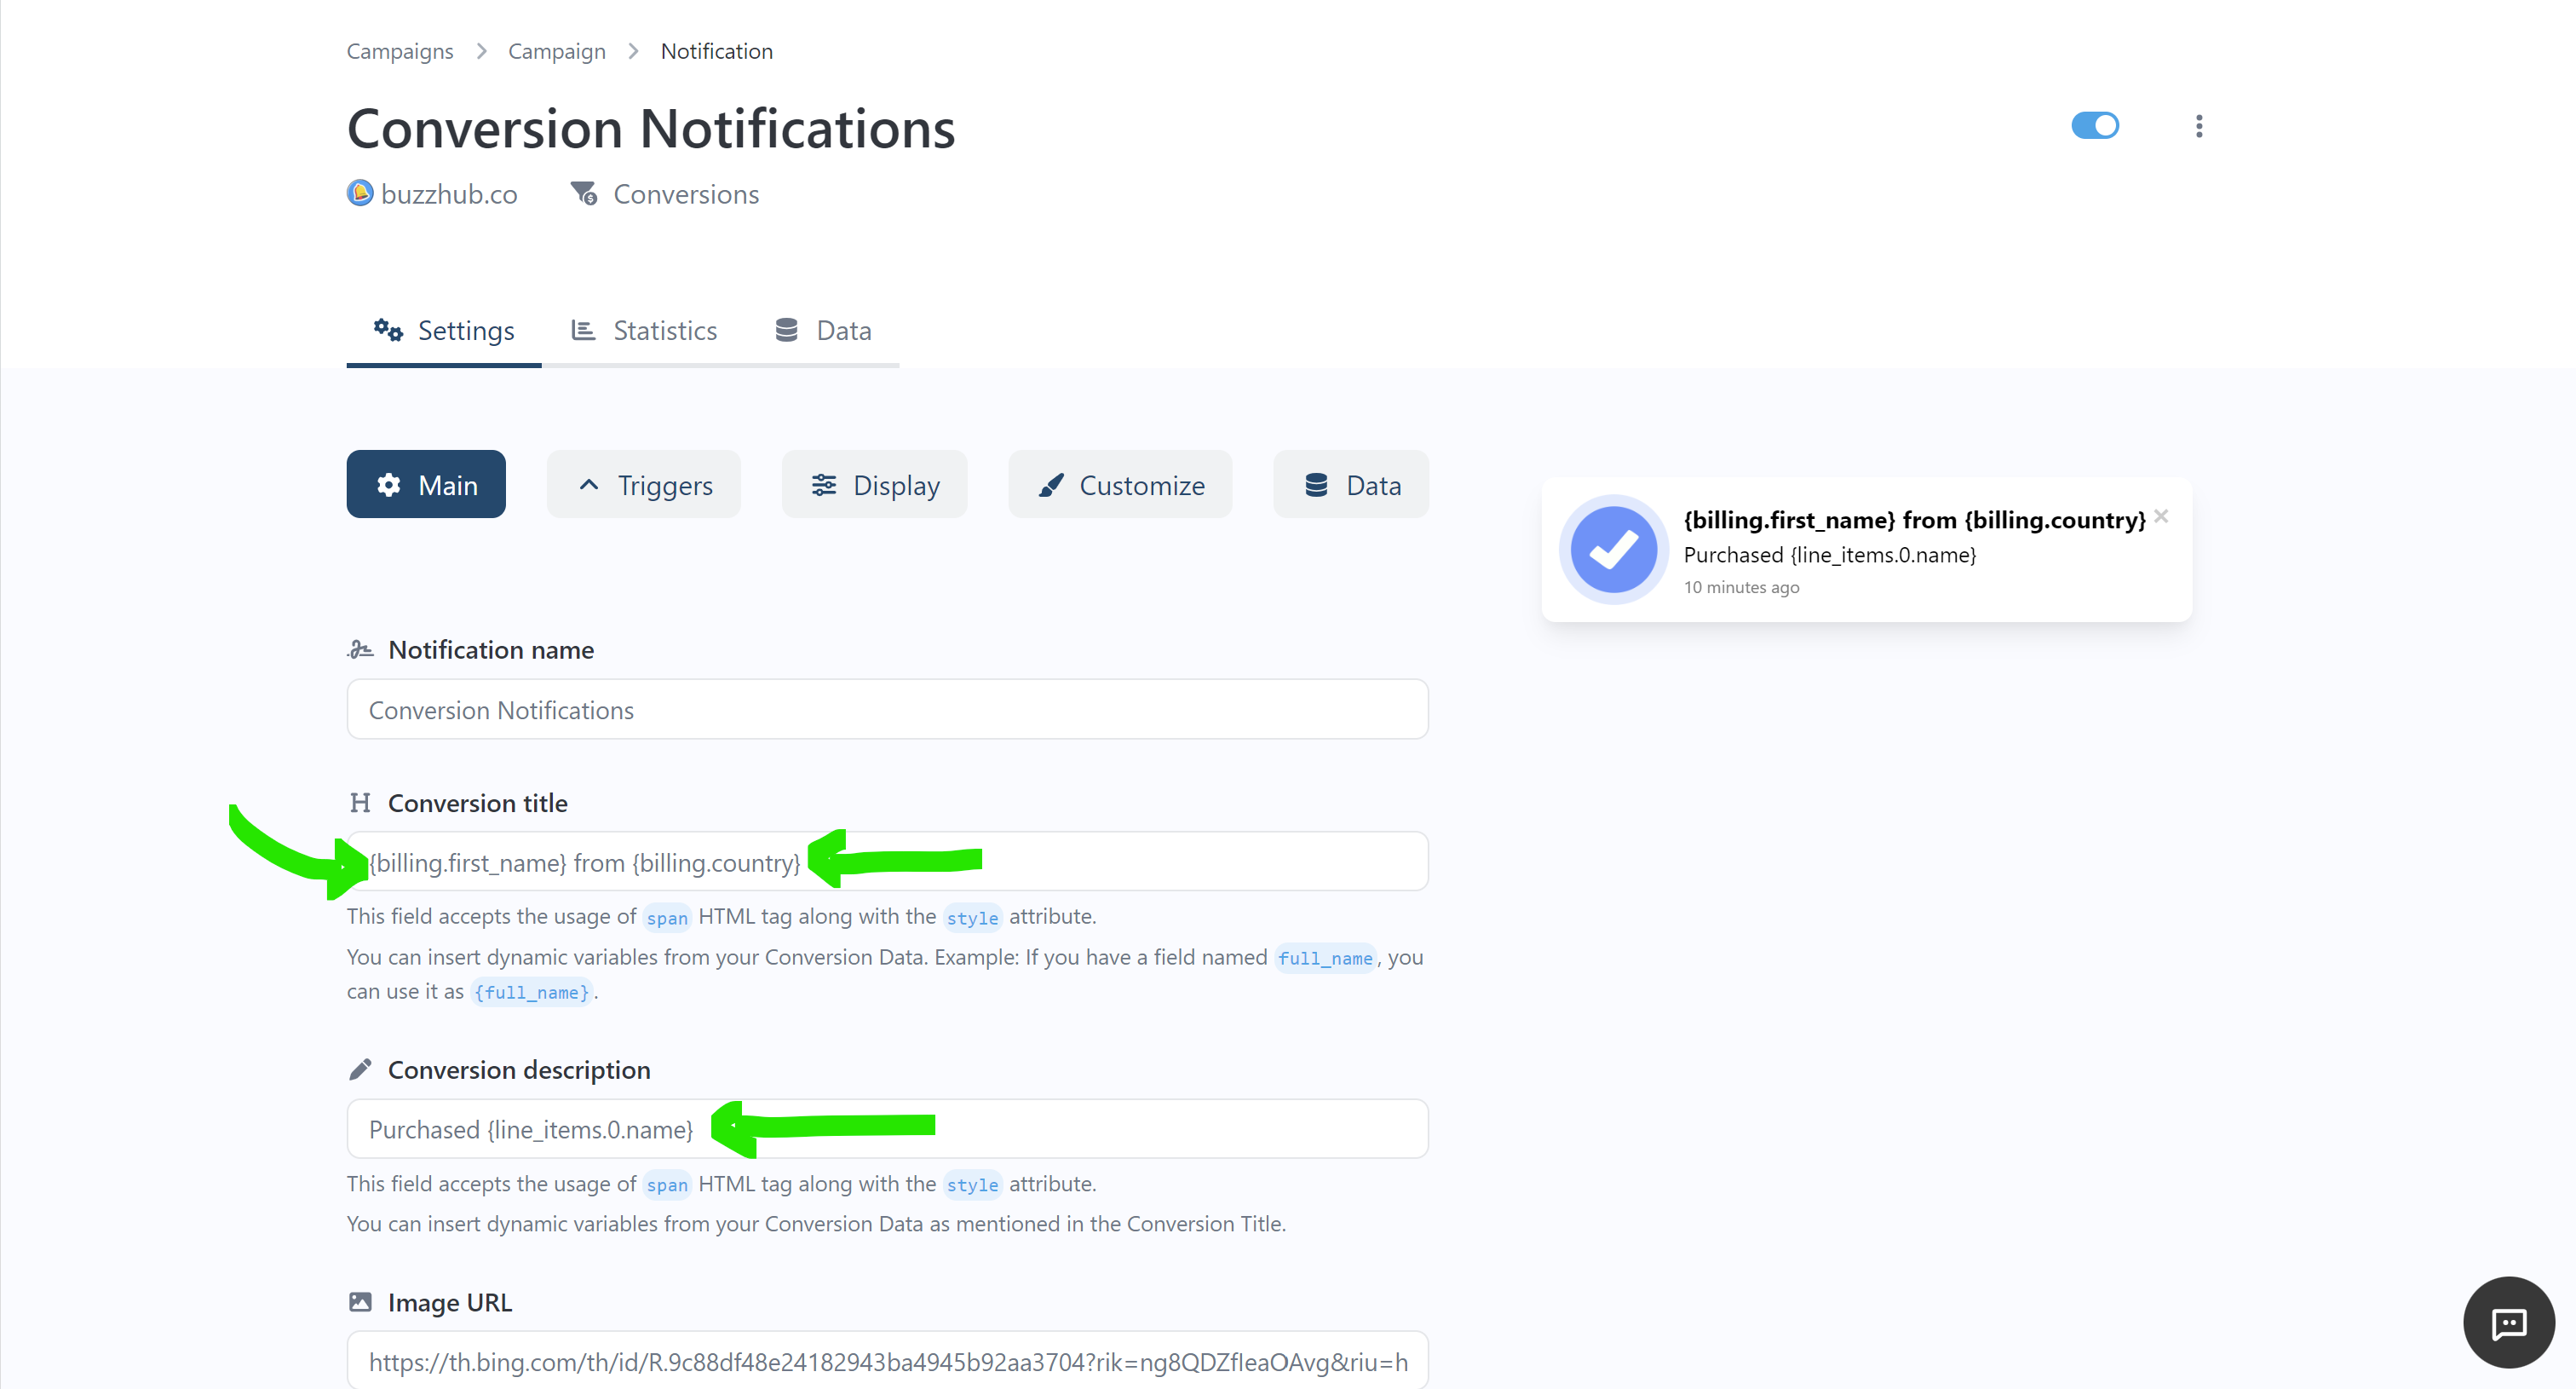
- Look for the fields labeled "Title" and "Description." These are where you can add dynamic content.
To display the customer's first name in the notification title, type {billing.first_name} where you want the name to appear. For example, you could write: "{billing.first_name} just made a purchase!"
If you want to show the product name that was purchased, type {line_items.0.name} in the description field. For example: "{billing.first_name} just bought {line_items.0.name}."

These "keys" (like {billing.first_name}) are placeholders that BuzzHub automatically replaces with real information from the sales data. When someone visits your website, they will see a notification that includes the actual name of the customer and the product they bought, making your notifications feel personalized and relevant.
Once you’ve added these keys, save your changes. Your notifications will now dynamically display the sales data in real-time, creating a more engaging experience for your visitors.
Conclusion
By following these steps, you will successfully send sales data from WooCommerce to BuzzHub. This setup allows you to leverage real-time purchase data to create dynamic notifications on your website, enhancing credibility and driving conversions.